O-YUM-G

  • Blog
  • What's For TV
  • Gallery
  • About
  • Index

Baking Club Adventure: Cookie Exchange!

May 22, 2016 by Libby Harrison in desserts

I realize it's May and we're talking about Christmas cookies - but the way the weather is behaving, it might as well be December! (Christmas Eve was MUCH warmer than it is today!)

One of the things the members of the baking club told me when I first joined, was that they did an epic Christmas cookie exchange every December.  Each member would make four dozen of four different kinds of cookies...that's 16 dozen cookies...per person!! Needless to say, I was excited and intrigued and started making my list of cookies I wanted to make last June (hey, it's never too early to think about Christmas!).

When December finally came, I took off a day of work just so I could focus on baking cookies - and it was a delightful vacation day, well spent. The day started with an 8:30am showing of the new Star Wars movie, a stop by one of my favorite Mediterranean restaurants for lunch to go, and then an afternoon in my kitchen with Christmas music playing in the background.  Heaven.

Keep reading for all of our cookies and some recipes!


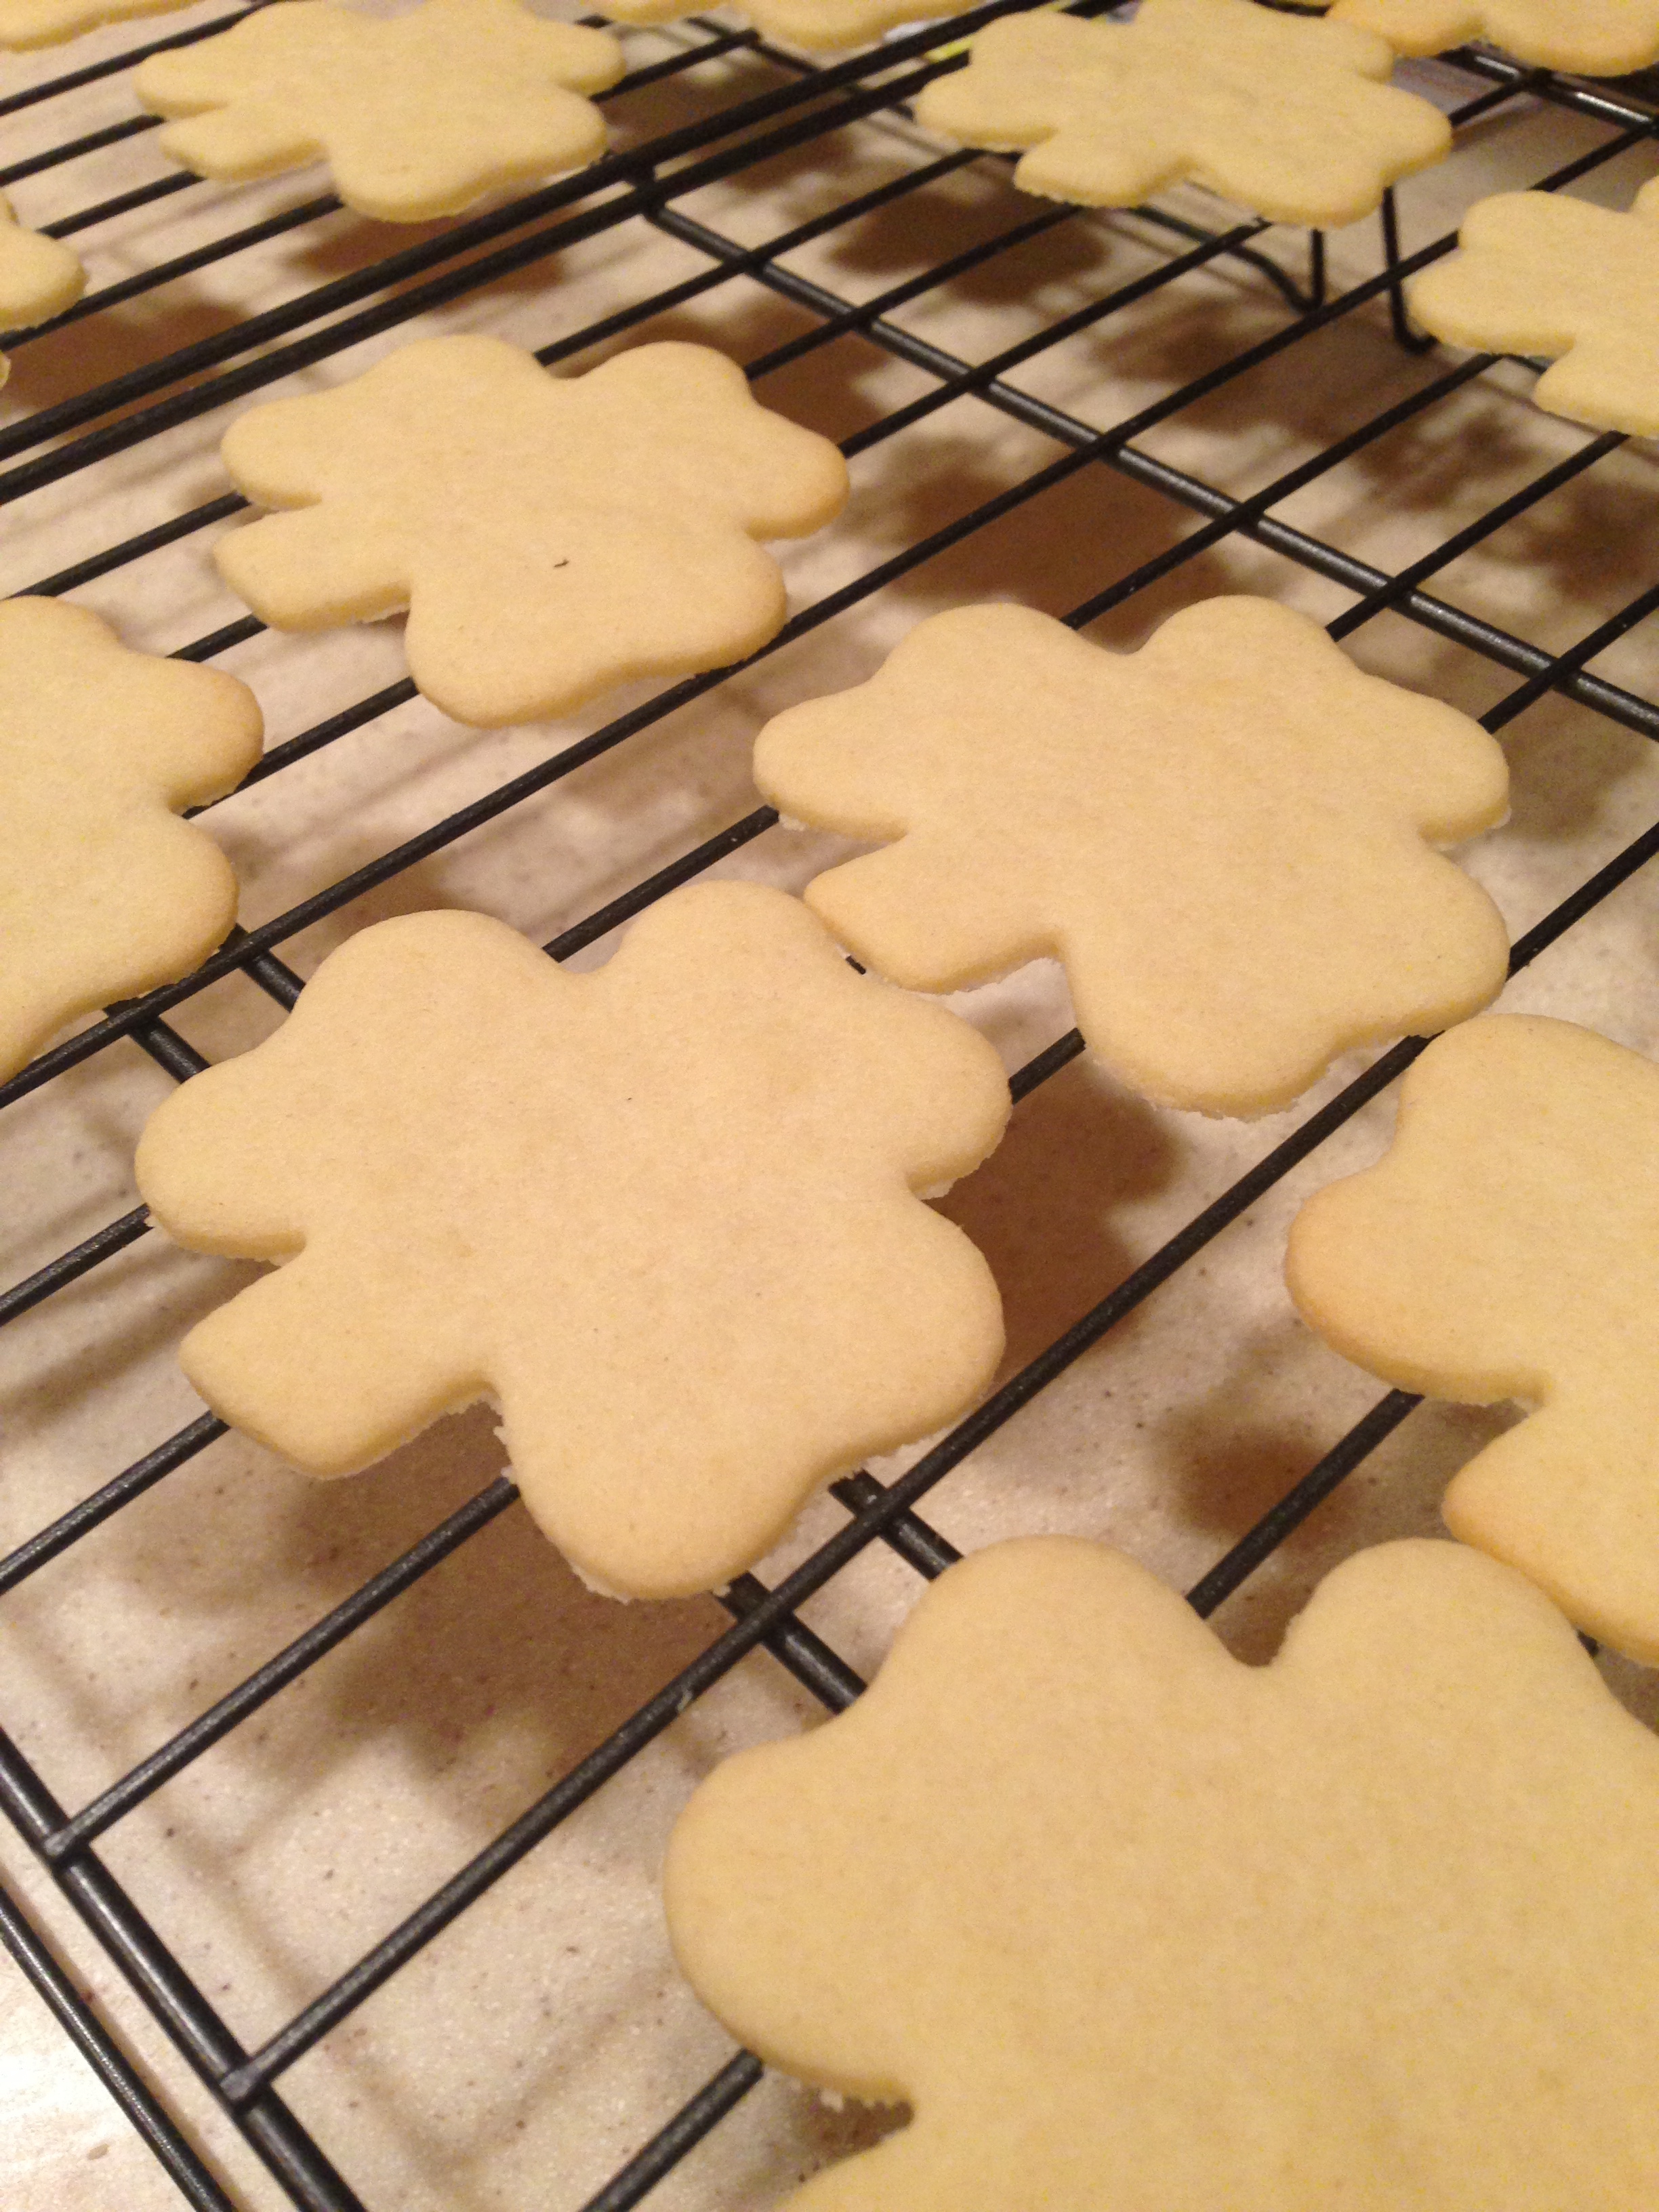
LIBBY - Spritz Cookies, Pecan Pie Bars, Rosemary-Lemon Shortbread, Italian Seed Cookies & Cheddar Cheese Wafers

In the end, I made 5 different kinds of cookies - a mix of classics that I used to make with my Mom and some new ones.  I even included a savory "cookie" for variety.   Here are some of the recipes I made:

PECAN PIE BARS

I love pecans but am generally not the biggest fan of pecan pie.  The ratio of crust to pecans to sweet, gooey filling is all off for me.  There ends up being way too much of the gooey stuff and I can really only take a bite or two before it's too much.  But these bars are a game-changer. A thick, slightly sweet crust is the base for the perfect blend of filling and pecans.  There's just the right amount of each component - and I dare you to eat just one!

Crust:

  • 3 cups flour
  • 1/2 cup sugar
  • 1 cup butter or margarine
  • 1/2 tsp. salt

Filling:

  • 4 eggs, slightly beaten
  • 1 1/2 cups Karo light corn syrup
  • 1 1/2 cups sugar
  • 3 Tbsp butter or margarine
  • 1 1/2 tsp vanilla
  • 2 1/2 cups pecans, toasted and chopped

Grease bottom and sides of a 10x15x1 inch baking pan (a half sheet or jelly roll pan will also work fine).

Prepare crust: In large bowl with mixer at medium speed, beat flour, sugar, butter and salt until mixture resembles coarse crumbs. Press firmly and evenly into the pan.  Bake in 350 oven for 20 minutes.

While crust is baking, prepare filling: In large bowl, stir eggs, corn syrup, sugar, butter and vanilla until blended.  Stir in pecans.  Spread evenly over hot crust. Return to 350 oven and bake for 25 minutes or until set.

Cool completely before cutting.

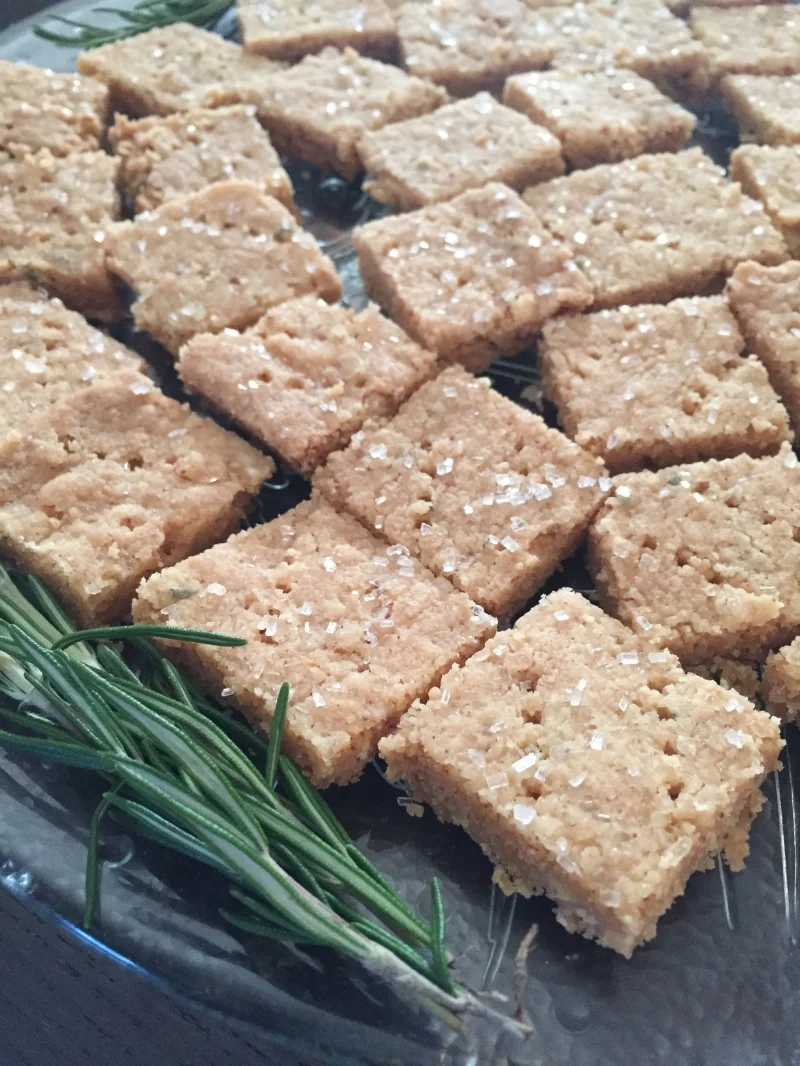
ROSEMARY-LEMON SHORTBREAD

These cookies are a variation on a shortbread recipe my mom received from a friend back when we were living in Germany in the 1980s. It called for rice flour before that ever became a common ingredient you easily find in the regular grocery store.  We often would replace the rice flour for another cup of regular flour - which never affected how quickly they were eaten! Since the shortbread is cut into 1" squares - it makes for a lot of cookies (up to 16 dozen) - and perfect for a cookie exchange or to give as gifts! 

  • 1 pound (4 sticks) butter, softened
  • 1 cup sugar
  • 3 cups all-purpose flour
  • 1 cup rice flour
  • 3 Tbsp fresh rosemary, chopped
  • 1 Tbsp fresh lemon rind
  • Sanding sugars (optional)

In the bowl of a mixer, cream butter and add sugar.  Slowly add in flours and then the rosemary and lemon rind. Pat in a half sheet or jelly roll pan.  Pre-cut the shortbread into 1" squares and prick each square with the tines of a fork.  Bake at 325 for 40-50 minutes until light golden brown.  Sprinkle with sugars (I either use clear sparkling sugars or seasonal red & green sanding sugars.)  While still warm, re-cut and prick the squares.

Variations:  Instead of rosemary & lemon add: 2 tsp cinnamon or 1 cup mini chocolate chips or 1 cup roasted pistachios, finely chopped.

CHEDDAR CHEESE WAFERS

Cheese wafers are a classic Southern staple, especially at the holidays.  Whenever I'd travel to Louisiana to visit family, I could always anticipate finding a plate of these at any one of my relative's homes.  It wasn't until my Mom moved to Tennessee that she discovered this variation on the cheese wafer, with the unexpected-but-delightful ingredient of...Rice Krispies!

  • 2 sticks butter or margarine
  • 2 cups sharp cheddar cheese, shredded (best if you hand-shred from a block)
  • 2 cups flour
  • 1/2 tsp salt
  • 1/2 tsp cayenne pepper
  • 2 cups Rice Krispies

In the bowl of a mixer, cream the butter and cheddar cheese.  Add flour, salt and cayenne and mix well.  Add in Rice Krispies and gently stir in until fully incorporated.  Shape the dough into small balls (about 1 tsp) and place on an ungreased cookie sheet.  Flatten each ball with a fork and bake at 350 for about 15 minutes.  These don't get brown - so be careful not to overbake.


GINA - Caramel Oat Lace Cookies, Hazelnut Kisses, Dulce de Lece Macaroons, Crunchy Almond Cookies & Triple Chocolate Drops (clockwise from top)

Caramel Oat Lace Cookies - via The Washington Post

These are a lovely cross between candy and a cookie, with hints of citrus and cardamom.  They look so fancy and elegant and would make for a perfect after-dinner treat, served with coffee or tea.

Hazelnut Kisses (Baci di Dama) - via The Washington Post

OMG - these were pretty much my favorite cookies of the whole bunch.  What's not to love with hazelnut shortbread cookies filled with homemade nutella?  While I gave away most of my cookie haul as gifts, I kept all of these for myself (sorry, not sorry!).

Dulce de Leche Macaroons - via The Washington Post

If you love the flavors of coconut and caramel - these cookies are for you!  They are an easy 5-ingredient cookie that come together in one bowl - and can be made in advance.

Crunchy Almond Cookies - via The Washington Post

These French cookies are dairy free and just four simple ingredients.  As a lover of anything almond flavored - these cookies weren't almond-y enough for me.  I would add a bit of almond extract to amp up the almond-ness of these cookies. 

Triple Chocolate Drops - via The New York Times

These cookies have it all: looks, taste and chocolate!  And not just one kind of chocolate...three! (technically four, if you count the semi-sweet chocolate shavings on top). The white chocolate glaze is really the shining star in this cookie - the smooth, creaminess of the glaze is the perfect pairing for a rich chocolate cookie base.


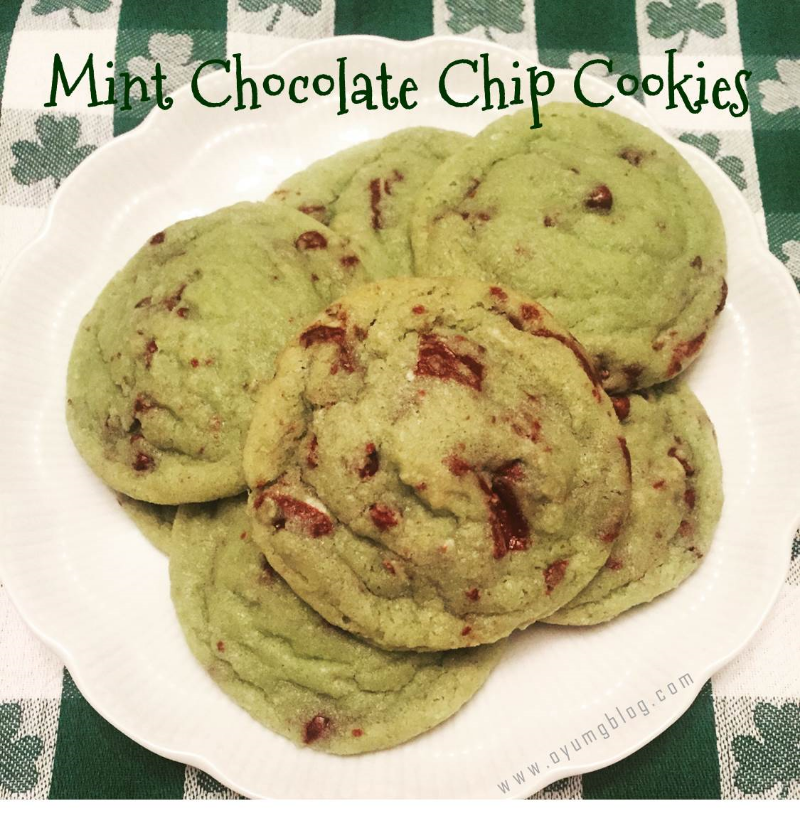
KLARE - Bullseye Chocolate Mint Cookies, Chocolate Raspberry Pinwheels, Ribbon Cookie & Orange Coconut Cookie (clockwise from top)

Klare got very creative in the kitchen with her cookies - making little tweaks here and there to make these cookies her own.  She also figure out how to be the most efficient with shaping and baking her cookies...all of these are slice and bake cookies.  It's amazing how different they all look - round logs, square logs, spirals and layers.  They're quite pretty and the flavors of each one are unique and so delicious.  The bullseye peppermint cookies taste like there's a peppermint patty hidden in the middle!


TONYA - Salted Dulce de Leche Thumbprints, Sicilian Almond Cookies, Chocolate Caramel Chews & Fruitcake Cookies (clockwise from top)

Salted Dulce de Leche Thumbprint Cookies - via Baked by an Introvert

These are just delicious...and dangerous!  It's much too easy to knock out four or five of these little one-bite cookies in the blink of an eye! The soft and tender shortbread cookie and the pool of ducle de leche with the sharpness of sea salt all make for a winning combination.

Sicilian Almond Cookies - via The Washington Post

Another call for almond lovers - these almond and cinnamon cookies get an extra dose of cinnamon when they're rolled in a cinnamon & sugar mixture right before baking. 

Chocolate Caramel Chews - via Rose Levy Beranbaum

These cookie bars have some of my favorite things layered one on top of another: crust, caramel, chocolate and nuts.  And they play together nicely in this cookie playground.  In a sea of round cookies, these triangle treats will surely stand out on any cookie platter!

Fruitcake Cookies - via Ina Garten

I think in the world of fruitcake, you're either a lover or a hater. I happen to fall in the latter camp - but my Mom LOVES her some fruitcake - so she was very excited to try these.  These cookies do require some advance planning - first you have to make your candied fruit mixture and let it sit overnight before you prepare the cookie.


So when the day was done, we sampled 18 different kinds of cookies.  I loved the diversity of flavors, ingredients and techniques but most of all enjoyed sharing this time with my fellow bakers.  So which ones are you going to put on your Christmas baking list for this year?  It's never too early to start planning...after all, Christmas is just 216 days away!!

May 22, 2016 /Libby Harrison
baking club, cookies, holiday
desserts
Comment

Mint Chocolate Chip Cookies

March 17, 2016 by Libby Harrison

It's St. Patrick's Day - and also the 2nd Anniversary of O-YUM-G!  What a fun 2nd year it's been!  I joined a baking club, enjoyed a 10-course Chinese wedding dinner, ate my way across NYC for a weekend, experimented with a variety of different ice cream flavors (pistachio was my favorite!), introduced a special "What's for TV" series with the advent of the fall TV season, and celebrated friend's birthdays with some fun cakes!

To celebrate the occasion (and as a nod to my first blog post), I made these mint chocolate chip cookies!  They're a fun way to get your green on for St. Patrick's Day and super easy to make.  By adding peppermint extract to the dough and chopped up Andes mints - you get a double dose of mint (but don't worry, it's not overpowering).  These cookies are really great for any occasion and are nice twist on a familiar favorite.  

Mint Chocolate Chip Cookies

  • 1 cup butter, softened
  • 1 1/2 cups sugar
  • 1 egg
  • 1 tsp vanilla extract
  • 1 tsp peppermint extract
  • green food coloring
  • 2 3/4 cups flour
  • 1 tsp salt
  • 1 tsp baking soda
  • 1/2 tsp baking powder
  • 1/2 cup chopped Andes mints
  • 1/2 cup mini chocolate chips
  1. Preheat oven to 375 degrees.
  2. In large bowl, beat butter for 3 minutes.  Add sugar and beat for another 3 minutes.
  3. Add egg and beat until mixture is light and fluffy.  Add extracts and enough green food coloring to your desired shade (I used about 20-25 drops).
  4. Mix in flour, salt, baking soda and baking powder until just combined.  Do not overmix.
  5. Gently stir in chopped Andes mints and mini chocolate chips.
  6. Using cookie scoop, drop cookies onto un-greased cookie sheet about 2 inches apart. Chill cookies on the cookie sheet in the fridge for about 15-20 minutes - this will help keep the cookies from spreading out too much.
  7. Bake for 8-10 minutes.  Let cool on cookie sheet for 2 minutes before removing them to a cooling rack.

Yield: about 40 cookies

March 17, 2016 /Libby Harrison
cookies, holiday
Comment
image.jpg

Chocolate Linzer Heart Cookies

February 14, 2016 by Libby Harrison

Happy Valentine's Day!  It's a chilly, three-day weekend here in the nation's capital, and there's nothing better to stay warm than get a little love in your heart...or these cookies in your tummy!  The flavors of chocolate and raspberry come together perfectly in these little sandwich cookies.  One of the things I like about this recipe, is that the dough doesn't need to be chilled (I hate having to wait longer than necessary for cookies!).  If you don't have a Linzer cookie cutter - all you need is a round biscuit cutter (about 2 1/2") and a smaller cookie cutter of any shape.

Chocolate Linzer Heart Cookies

  • 2 cups butter (cold, cut into pieces)
  • 1 cup sugar
  • 1 tsp vanilla extract
  • 1/2 tsp almond extract
  • 3 1/2 cups flour
  • 1/2 cup cocoa powder
  • 1 pinch salt
  • Raspberry jam (preferably unseeded)
  • Powdered sugar (for sprinkling)
  1. Preheat oven to 350 degrees.
  2. In bowl of electric mixer, add butter and sugar and beat until well blended.  Add extracts.
  3. Slowly add flour, cocoa powder and salt until a dough forms.  If dough seems too dry and crumbly, you can add vodka or amaretto (or milk) just until the dough comes together.
  4. Take half of the dough, and roll out onto a floured surface to 1/4 inch thickness.  Cut out bases of cookies (about 32). Roll out the other half of the dough, and cut out the tops of the cookies, along with the heart cutout (about 32).  Reroll dough scraps to cut more cookies.
  5. Bake for about 10-12 minutes, until just golden brown.  Cool completely before assembling.
  6. To assemble, first set the tops of the cookies on a cookie sheet and  sprinkle with powdered sugar.  Then turn the base cookies upside down and add 1 tsp raspberry jam.  Place tops onto the bottoms to complete the Linzer cookies.

Yield: about 32 cookies  

image.jpg
image.jpg
February 14, 2016 /Libby Harrison
chocolate, cookies, holiday
Comment

Kit-Kat Krispies

May 15, 2014 by Libby Harrison in desserts

Happy National Chocolate Chip Day!!  A day where we celebrate the tiny little nuggets of chocolatey goodness.  A little history lesson: the chocolate chip was invented back in the early 1930s by Ruth Graves Wakefield at the Toll House Inn in Whitman, Massachusetts.  She had been making cookies one day and added a chopped up bar of Nestle semi-sweet chocolate.  Some say it was intentional (she was trying to change up a toffee cookie recipe), others say it was accidental (she ran out of baking chocolate and used a bar of Nestle, expecting it to melt completely).  Either way, they were such a hit that she ended up striking a deal with Nestle to provide her cookie recipe on the package of the Nestle chocolate bars in exchange for a lifetime supply of chocolate. The Nestle Toll House brand is named after the inn where she cooked up her now world famous recipe!  Quick aside: anytime I hear Nestle Toll House, I think of the Friends episode where Monica tries to recreate Phoebe's grandmother's cookie recipe, only for it to actually be the Nestle Toll House recipe or as Phoebe says it "NESS-lay TOOL-ow-zeh".  You can catch a clip of it here.

So, history lesson out of the way, what better way to honor this most auspicious of days than with a batch of chocolate chip cookies? But let's not just make regular ole' chocolate chip cookies...let's make them with a twist!  And so I give you Kit-Kat Krispies...a crispy-on-the-outside, soft-and-chewy-on-the-inside chocolate chip cookie loaded with Kit-Kat bars, semi-sweet chips, Rice Krispies and potato chips. Yes, potato chips!  Trust me...you'll want to add a lunch sized bag of potato chips to your chocolate chip cookies from now on. 

This recipe was the product of some experimentation and merging of a couple recipes.  A few years ago, I discovered this amazing dessert restaurant in New York City called Milk Bar (if you're ever in NYC you MUST go!). Their claim to fame is the Compost Cookie, an everything-but-the-kitchen-sink cookie that utilizes a little bit of whatever you have on hand: chocolate chips, pretzels, candy bars, coffee grinds, graham crackers, nuts, whatever.  There's a lot of creaming (10 minutes worth!) and some chilling of the dough (at least 2 hours) and making a graham cracker crust to crumble in.  All of which is worth it when you have the time.  But most of the time, when I'm in the mood for chocolate chip cookies, I've got an inner Cookie Monster rumbling inside and she wants her cookies NOW!  So I took the concept of adding in a variety of different ingredients you wouldn't normally throw in a chocolate chip cookie and applied it to my very favorite and easy chocolate chip recipe. This is a highly adaptable recipe; you can make it as simple or complex as you like.  Just try to keep the total volume of your mix-ins to about 1 1/2 cups.  O-YUM-G!  So here we go:

View fullsize IMG_3179.jpg
View fullsize IMG_3181.jpg
View fullsize IMG_3182.jpg
View fullsize IMG_3183.jpg
View fullsize IMG_3184.jpg
View fullsize IMG_3186.jpg
View fullsize IMG_3189.jpg
View fullsize IMG_3191.jpg
View fullsize IMG_3198.jpg

KIT-KAT KRISPIES

  • 1/3 cup butter, softened
  • 1/3 cup shortening, butter-flavored
  • 1/2 cup white sugar
  • 1/2 cup brown sugar
  • 1 egg
  • 2 tsp vanilla
  • 1 3/4 cup flour
  • 1/2 tsp salt
  • 1/2 tsp baking soda
  • 2 packages Kit-Kat bars (regular size), chopped
  • 1/3 cup semi-sweet chocolate chips
  • 1/3 cup Rice Krispies cereal
  • 1 oz bag potato chips

Preheat oven to 375 degrees.  Cream your butter, shortening, white sugar and brown sugar until smooth. Add egg and vanilla and mix until smooth and lightened in color.  Add your flour, salt and baking soda. Mix until just combined.  Then stir in the Kit-Kat pieces, chocolate chips, Rice Krispies and potato chips.  Stir until just combined.  Don't overmix.  With a cookie scoop, portion out balls of dough onto ungreased cookie sheet about 1-inch apart.  Bake for 10-12 minutes until lightly golden brown.  Don't overbake.  Let cool on the cookie sheet for 2-3 minutes; then transfer to a cooling rack to cool completely.

Yields 32 cookies.

May 15, 2014 /Libby Harrison
cookies, Milk Bar
desserts
Comment
nutterbutters.jpg

Homemade Nutter Butters!

April 07, 2014 by Libby Harrison in desserts

Greetings, friends! Hope you all had a great weekend.  Mine was very good but quite full of brunches, parties and baking!

So one of the parties I went to this weekend was a homecoming celebration for the fiancee of a family friend who had been away on deployment with the Navy. I wanted to bring something special to the party, and since the bride-to-be is gluten free, I had the perfect party treat in mind: homemade nutter butters (you may begin drooling now).

For years, I've been making my go-to recipe for peanut butter cookies, one that I discovered while watching Sara Moulton on the Food Network (remember Cooking Live?).  It's a simple, flourless peanut butter cookie, which really lets that peanut butter flavor take center stage.  One of my complaints with traditional peanut butter cookie recipes is that once you add the flour, it dilutes the flavor.  But not with these.  These little gems taste like pure peanut butter and just melt in your mouth. So, as I said, I've been making these for years, and was quite content with just eating them as they were. 

But one day, I was browsing the interweb (I make up words from time to time) and came across the idea of making a homemade version of Nutter Butters. I immediately went to my kitchen, whipped up these cookies and then made a peanut butter frosting filling. They say peanut butter and jelly are the best combination but I say peanut butter and peanut butter trumps all.  Just make these nutter butters and I think you'll agree!

Let's get started.  One of the best things about this recipe is that it requires 4 simple ingredients and can be mixed together by hand.  No special equipment required! So grab a large bowl and a rubber spatula and mix together your peanut butter, sugar, egg and baking soda (really! that's all the ingredients!). This recipe is easily doubled, as one jar of peanut butter is equal to two (2) cups - so I often double the recipe because 1) it's peanut butter cookies and 2) I'm too lazy to measure out just one cup of peanut butter.  

It will be very thick and should look like this.  Then use a tablespoon to measure out scoops of dough.  Roll them into balls and place on a cookie sheet about one inch apart.

With a fork, make the traditional criss-cross design as you flatten the balls of dough.  Bake in a 350 degree oven for about 10 minutes.

Now as the cookies cool, make that yummy frosting.  Start by blending peanut butter and butter (or margarine). Add powdered sugar, vanilla and enough milk to get the desired consistency.  Mix until lighter in color and fluffy. 

Now to get that frosting happily sandwiched between the cookies, you can use a knife to spread a glob of frosting on the cookie or use a scoop to portion out equal amounts.  I used my #40 scoop to make generous dollops of frosting on each cookie. If you've gone this far, you might as well keep going with a big 'ol heap of frosting, right?!

Then top off those open-faced peanut butter sandwiches of goodness with another cookie and voila!  Homemade nutter butters!  Hardest part is not eating them all!


Here's the full recipe:

Homemade Nutter Butters

Cookies:

  • 1 cup peanut butter (creamy or chunky)
  • 1 cup sugar
  • 1 egg
  • 1 teaspoon baking soda

Preheat oven to 350 degrees.  In a large bowl, mix together all ingredients until well combined. Using a tablespoon, measure out scoops of dough and roll into balls.  Place them on a cookie sheet about one inch apart.  With a fork, flatten the dough making a crosshatch pattern. Bake cookies until puffed and pale golden, about 10 minutes.  Cool cookies on baking sheet for two (2) minutes then transfer to racks to cool completely.

Frosting:

  • 1 cup butter or margarine
  • 1 cup peanut butter 
  • 2 1/2 cups powdered sugar
  • 1 teaspoon vanilla
  • 3-4 teaspoons milk

In a large bowl, beat together butter and peanut butter and blended and smooth.  Add the powdered sugar one cup at a time.  Add vanilla and mix.  Add enough milk to get the desired consistency then mix until lighter in color and fluffy

Assemble the nutter butters by spreading or scooping a generous amount of frosting onto the bottom of one cookie and topping it off with another.

Yields: 20 nutter butter sandwiches

April 07, 2014 /Libby Harrison
cookies, gluten free, peanut butter
desserts
1 Comment
happy-st-patrick39s-day-folks38.jpg

Happy St. Patrick's Day!

March 16, 2014 by Libby Harrison

I think it's only fitting that my first blog post is in tandem with a holiday, 'cause there's nothing I love more than decorating...and baking for a holiday!  So here I give you some festive shamrock cookies!

The secret to any decorated cookie is a good cookie dough.  And I have no better recipe than this one.  It has simple ingredients, great flavor and great structure for holding cookie cut out shapes.  Unfortunately, I don't have the step-by-step pictures for making the dough, but it's pretty easy. The only hard part is waiting for the dough to chill before rolling out!

So here's the recipe:


BEST ROLLED SUGAR COOKIES

  • 1 1/2 sticks butter
  • 1 cup sugar
  • 2 eggs
  • 1 tsp vanilla
  • 2 1/2 cups flour
  • 1 tsp baking powder
  • 1/2 tsp salt

Cream together butter and sugar.  Add eggs and vanilla.  Mix well.  Stir in the flour, baking powder and salt.  Place half of the dough between two sheets of wax paper and roll out to a thick slab.  Repeat for the other half.  Chill the dough for at least 1 hour (or overnight).

Preheat oven to 400.  Turn one slab of dough onto a floured surface and roll to 1/8 - 1/4 inch thickness.  Cut into any shapes with any cookie cutter.  Place cookies 1 inch apart on and ungreased cookie sheet.  Bake for 6 minutes.  Cool for 1 minute on cookie sheet before transferring to cooling rack.  Let cool completely before icing/frosting.

Yields 4-6 dozen cookies, depending on cookie cutter size.


And here are the baked cookies.  Now for the fun part...the decorating!  

I had made this recipe a few weeks ago to make some cookies for a friend's baby shower.  She is adopting from the Congo and so I made cookies in the shape of the state of Maryland (where she lives) and the African continent (where her daughter is).  I made royal frosting and dyed it yellow and blue - two of the colors in the Congolese flag (see the decorated cookies in the Gallery page).  

Well, the recipe made WAY too much for what I needed, so I just saved the frosting for another time.  A few days later, we had a snow day (yet another one) and seeing how it was the day before Mardi Gras, I thought, "I'll make some Mardi Gras cookies!"  The colors of Mardi Gras are green, purple and gold.  Since I already had the building blocks of those colors, I used my knowledge of the color wheel and magically made the colors I needed.  But once again, I was found with leftover frosting, particularly green.  And so, my brain jumped to the next holiday...St. Patrick's Day!  And what a perfect excuse to use this green frosting but to make shamrock cookies!  And now we've come full circle.

So one of the handy shortcuts I've learned over the years is the value of a plastic zipped bag as a piping bag.  Simply snip off a corner and insert your tip and coupler.  Fill with your frosting and go to town!  

For these cookies, I used two different kinds of green sugar sprinkles: dark green and light green.  Mainly because I didn't have enough of the dark green for all the cookies.  Plus, it will make for some nice contrast when the cookies are plated.  Once I put the light green sprinkles on, their color sort of got absorbed by the frosting color, so it looks more like a frosted sparkle - but I think they still look pretty.

Well, that's a wrap, I think, on this first blog post!  Thanks for reading and I look forward to sharing more recipes, stories and pictures with you!

March 16, 2014 /Libby Harrison
cookies, decorated, holiday
Comment

Powered by Squarespace