O-YUM-G

  • Blog
  • What's For TV
  • Gallery
  • About
  • Index

Caramel Popcorn: Your Next Addiction

February 07, 2015 by Libby Harrison in desserts

I seem to have this penchant for making things that are truly addictive.  That once-you-pop-you-can't-stop kind of addicting.  Brownies, cookies...basically anything with sugar.  And now I bring you your next addiction: Homemade. Caramel. Corn.  Holy cow, is this stuff so good.  And I dare you to make a batch last longer than the weekend.  Seriously.

So this recipe has been with me for nearly twenty years...I first made it my middle-school home economics class! The fun thing with this recipe, is that start-to-finish, it's made completely in the microwave.  No heating up your oven, no fancy equipment, if you've got a bowl, a microwave and a paper bag, you can make this recipe!

There are three microwave phases for this recipe: the popcorn phase, the caramel phase and the caramel corn phase.

PHASE ONE: Start off by popping 3 standard bags of microwave popcorn. I use the 94% fat-free, low-butter variety, because, believe me, you'll be adding more than enough butter once the caramel sauce is covering each and every kernel.  Then take a standard, grocery-store size paper bag and spray the inside of it about 2/3 of the way up with non-stick spray.  As you pop your popcorn, dump each bag into the paper bag.  

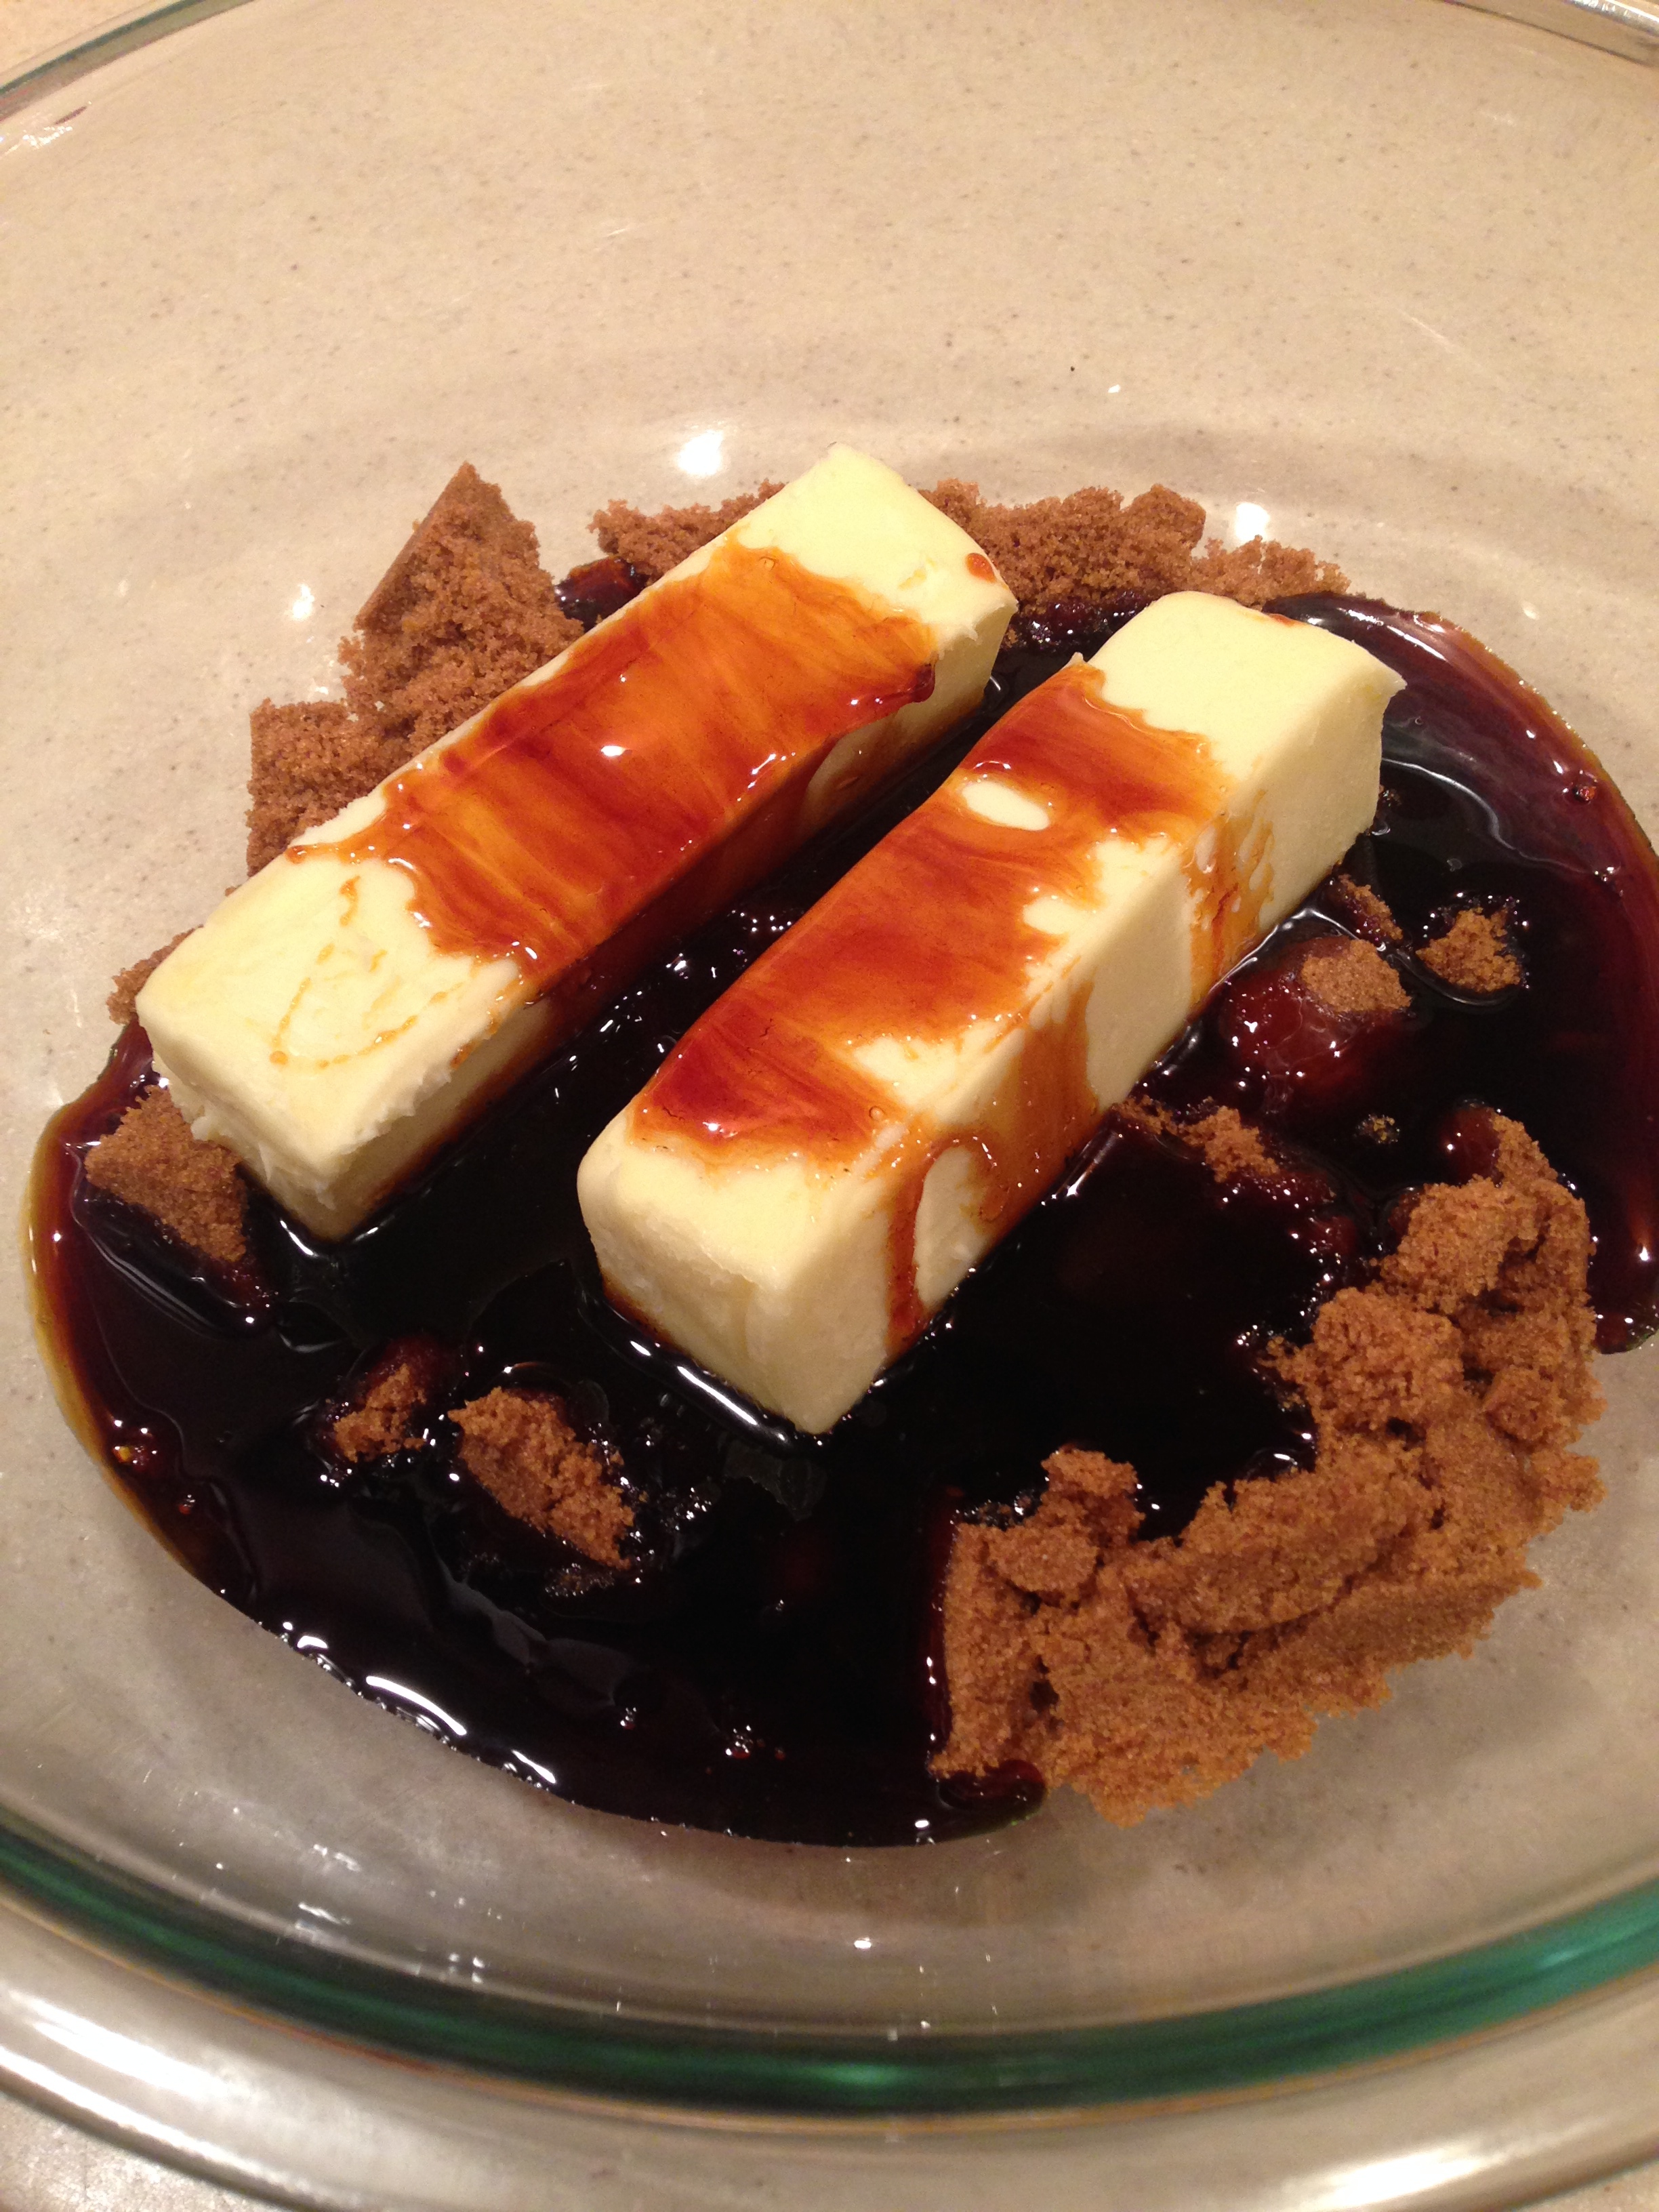
PHASE TWO: In a large, microwave-safe glass bowl, add brown sugar, butter and corn syrup.  Microwave on high for 8 minutes.  Carefully remove from the microwave and stir.  Add baking soda, baking powder and vanilla and stir.  When you add the vanilla, it will start to change the color and consistency (it will get frothy and may rise a bit).  Keep stirring until the mixture is uniform.  It should be a light, golden brown.

PHASE THREE: Carefully pour the caramel mixture over the popcorn in the paper bag.  With a long rubber spatula, mix the caramel and popcorn until all kernels are covered.  Roll up the top of the bag and put the whole thing in the microwave.  You may have to smoosh it in there to make sure that the turntable will still rotate.  Microwave on high for 3 minutes.  Open the bag and mix with the rubber spatula for about 30 seconds, making sure to scrape the bottom.  Roll the bag and return to the microwave for another minute.  Mix for about 30 seconds and microwave for a last burst of 30 seconds.  Either line two jelly roll pans or your countertop with wax paper and carefully pour the caramel corn on top.  Spread out in an even layer and separate the pieces as it cools.  Once the corn is finally cool, break up any large chunks and store in an air-tight container.  It will keep pretty fresh for about a week - that is, if it makes it that long!

Microwave Caramel Corn

  • 3 standard bags of microwave popcorn, popped
  • 2 cups dark brown sugar
  • 1 cup butter (or margarine)
  • 3/4 cup light corn syrup
  • 3/4 tsp baking soda
  • 3/4 tsp baking powder
  • 1/4 tsp salt
  • 1 tsp vanilla

Pop the popcorn and put into a large brown paper bag, sprayed with non-stick spray on all sides.  Set aside.

In a large bowl, place the butter, brown sugar and corn syrup.  Microwave on high for 8 minutes or until the brown sugar is dissolved and the mixture is at a rapid boil. 

Remove from microwave and add baking soda, baking powder, salt and vanilla.  Be aware that mixture may rise.  Carefully pour the caramel over the popcorn in the bag and thoroughly stir until all the popcorn is coated in caramel.  Roll up the bag and microwave on high for 3 minutes.  Stir the popcorn for 30 seconds. Return to microwave for 1 minute.  Stir the popcorn for 30 seconds.  Return to microwave for 30 seconds.  Stir one last time and let the popcorn cool on wax paper covered pans or countertop.  Once cooled, break up any large pieces and store in air-tight container. 

February 07, 2015 /Libby Harrison
caramel, popcorn, gluten free
desserts
Comment
nutterbutters.jpg

Homemade Nutter Butters!

April 07, 2014 by Libby Harrison in desserts

Greetings, friends! Hope you all had a great weekend.  Mine was very good but quite full of brunches, parties and baking!

So one of the parties I went to this weekend was a homecoming celebration for the fiancee of a family friend who had been away on deployment with the Navy. I wanted to bring something special to the party, and since the bride-to-be is gluten free, I had the perfect party treat in mind: homemade nutter butters (you may begin drooling now).

For years, I've been making my go-to recipe for peanut butter cookies, one that I discovered while watching Sara Moulton on the Food Network (remember Cooking Live?).  It's a simple, flourless peanut butter cookie, which really lets that peanut butter flavor take center stage.  One of my complaints with traditional peanut butter cookie recipes is that once you add the flour, it dilutes the flavor.  But not with these.  These little gems taste like pure peanut butter and just melt in your mouth. So, as I said, I've been making these for years, and was quite content with just eating them as they were. 

But one day, I was browsing the interweb (I make up words from time to time) and came across the idea of making a homemade version of Nutter Butters. I immediately went to my kitchen, whipped up these cookies and then made a peanut butter frosting filling. They say peanut butter and jelly are the best combination but I say peanut butter and peanut butter trumps all.  Just make these nutter butters and I think you'll agree!

Let's get started.  One of the best things about this recipe is that it requires 4 simple ingredients and can be mixed together by hand.  No special equipment required! So grab a large bowl and a rubber spatula and mix together your peanut butter, sugar, egg and baking soda (really! that's all the ingredients!). This recipe is easily doubled, as one jar of peanut butter is equal to two (2) cups - so I often double the recipe because 1) it's peanut butter cookies and 2) I'm too lazy to measure out just one cup of peanut butter.  

It will be very thick and should look like this.  Then use a tablespoon to measure out scoops of dough.  Roll them into balls and place on a cookie sheet about one inch apart.

With a fork, make the traditional criss-cross design as you flatten the balls of dough.  Bake in a 350 degree oven for about 10 minutes.

Now as the cookies cool, make that yummy frosting.  Start by blending peanut butter and butter (or margarine). Add powdered sugar, vanilla and enough milk to get the desired consistency.  Mix until lighter in color and fluffy. 

Now to get that frosting happily sandwiched between the cookies, you can use a knife to spread a glob of frosting on the cookie or use a scoop to portion out equal amounts.  I used my #40 scoop to make generous dollops of frosting on each cookie. If you've gone this far, you might as well keep going with a big 'ol heap of frosting, right?!

Then top off those open-faced peanut butter sandwiches of goodness with another cookie and voila!  Homemade nutter butters!  Hardest part is not eating them all!


Here's the full recipe:

Homemade Nutter Butters

Cookies:

  • 1 cup peanut butter (creamy or chunky)
  • 1 cup sugar
  • 1 egg
  • 1 teaspoon baking soda

Preheat oven to 350 degrees.  In a large bowl, mix together all ingredients until well combined. Using a tablespoon, measure out scoops of dough and roll into balls.  Place them on a cookie sheet about one inch apart.  With a fork, flatten the dough making a crosshatch pattern. Bake cookies until puffed and pale golden, about 10 minutes.  Cool cookies on baking sheet for two (2) minutes then transfer to racks to cool completely.

Frosting:

  • 1 cup butter or margarine
  • 1 cup peanut butter 
  • 2 1/2 cups powdered sugar
  • 1 teaspoon vanilla
  • 3-4 teaspoons milk

In a large bowl, beat together butter and peanut butter and blended and smooth.  Add the powdered sugar one cup at a time.  Add vanilla and mix.  Add enough milk to get the desired consistency then mix until lighter in color and fluffy

Assemble the nutter butters by spreading or scooping a generous amount of frosting onto the bottom of one cookie and topping it off with another.

Yields: 20 nutter butter sandwiches

April 07, 2014 /Libby Harrison
cookies, gluten free, peanut butter
desserts
1 Comment

Powered by Squarespace