
King Arthur Flour Bake-cation: Day 3
Well, our week is now half-way over but there's still so much deliciousness to get to!
Now that we reached day 3 - it was time to finally prep our puff pastry for baking. We rolled it out into a giant rectangle and then docked it with this fancy roller that gently poked the dough. Docking helps steam escape and prevents giant bubbles from forming when in the oven.
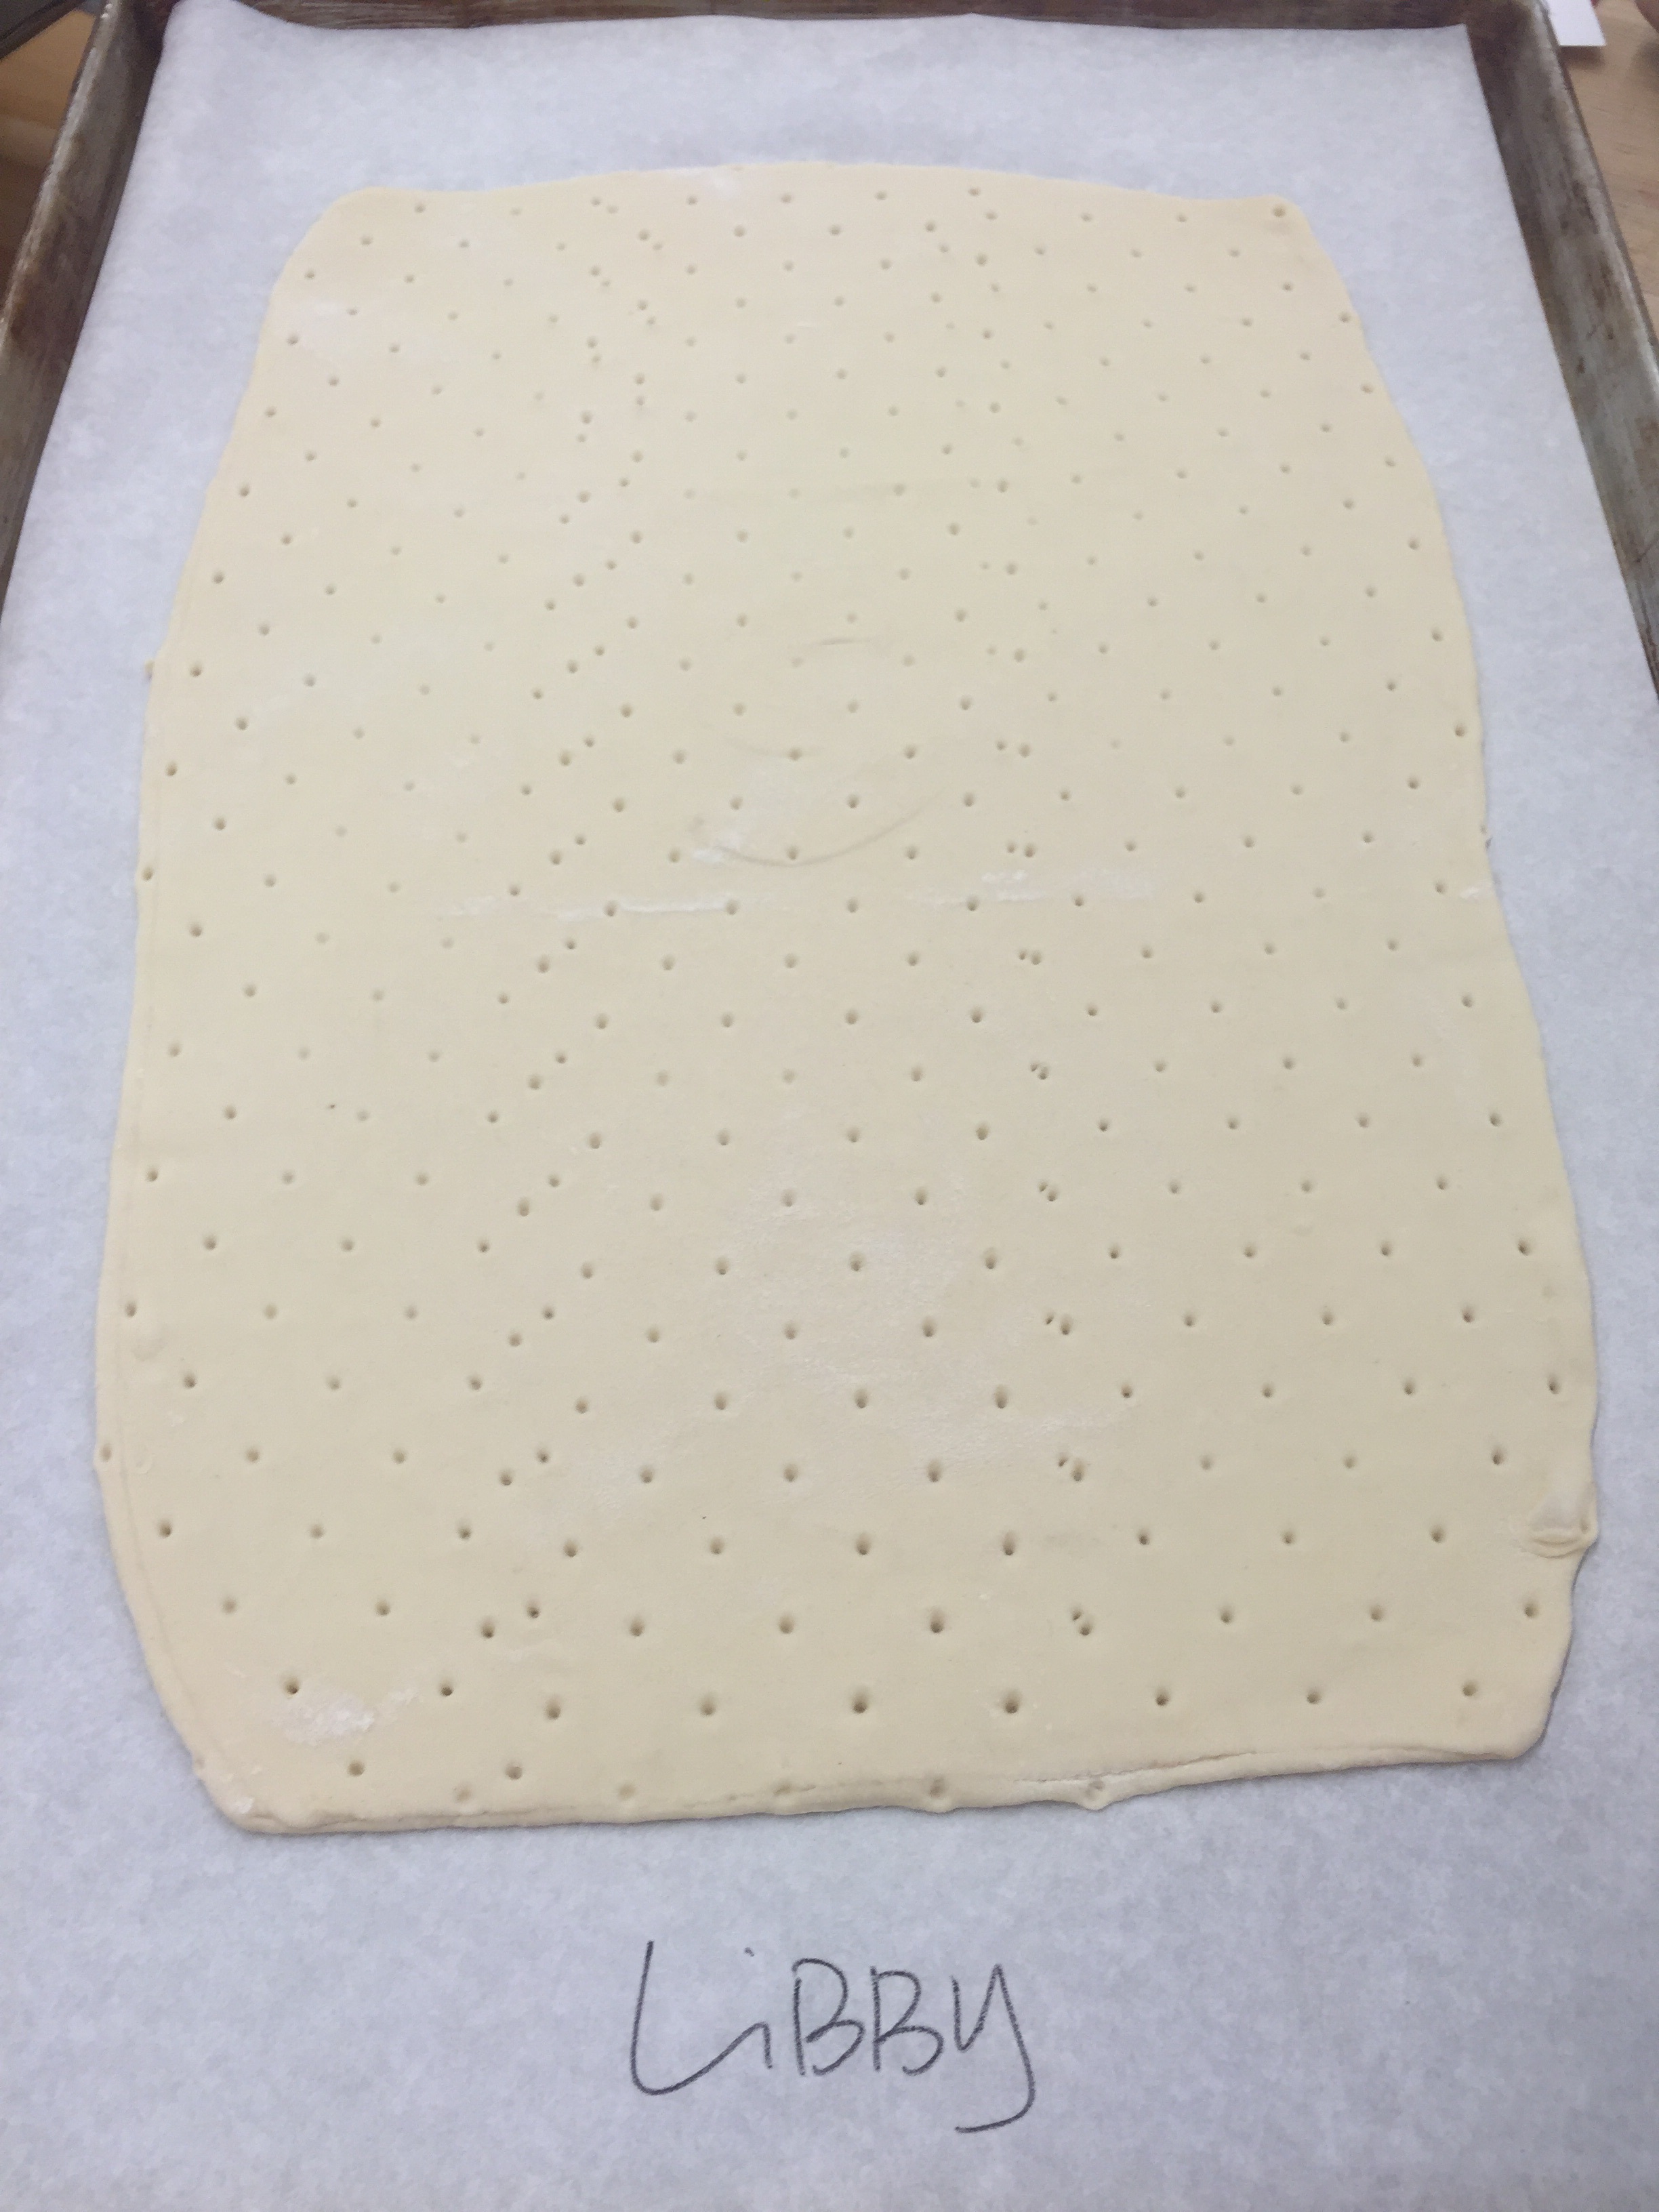
The docked puff pastry dough, prior to baking.
As with all the other steps in puff pastry, we needed to chill it one last time before baking in the oven. While we were waiting for that to happen, we turned our attention to the assembly of the Sacher tortes.
First, we had to make the chocolate glaze that was going to cover the entire cake. It was surprisingly easy and with only two ingredients: chocolate and boiling water. Today's instructor, Becca, made a big batch for the entire class to use, and because of the large amount, she used an industrial-sized immersion blender. Normally, you wouldn't ever mix chocolate and water, but because of the power of the immersion blender, we're able to create an emulsion where the water droplets become dispersed throughout the chocolate and a glossy glaze is formed.

Industrial-sized immersion blender in a bucket of chocolate glaze.
Once we had the glaze prepared, it was time to assemble our Sacher tortes. First, we had to split the cake into two layers and cover the bottom layer with apricot preserves - the hallmark ingredient of a traditional Sacher torte.

We're (apricot) jamming now!
Then we poured that sumptuous chocolate glaze onto the top of the cake and with a spatula, evenly spread it across the top and along the sides of the cake.


The finished Sacher torte!I

Inside the Sacher torte
Another pastry down, it was time to start the prep on our next creation: chocolate truffles! The step we were tackling today was the ganache. So we heated up some milk and honey and poured it over a mix of milk and dark chocolate chips.

Adding our boiled milk and honey over a mix of milk & dark chocolate chips
Then we gently whisked the mixture, being careful not to add too much air. Looking a little not-put-together right now...

Getting closer...

It's perfect! And now we pour onto a sheet pan, cover it with plastic wrap (to keep a skin from forming) and let it chill in the fridge until we're ready to work with it tomorrow.

Our chocolate ganache - Mom (Linda) and I will be sharing this batch, so we labeled with our name...times two!
While we were making our chocolate ganache, our puff pastries were baking and cooling. And ta-da! Isn't it beautiful?! So flakey, so buttery, so golden-y! Some of you may be thinking, "umm...where's the puff"? Don't worry, the layers are there - but we actually inhibited a full on puffing by placing another sheet pan directly on top of the dough. This ensured that the pastry would rise evenly. And because we were going to be slicing this and layering it with pastry cream, we didn't want the pastry to be too thick (or else it'd be extra hard to eat).

So here's the pastry cut into thirds in strips and the bottom layer covered in a layer of piped pastry cream. We put the middle layer on, piped another layer of pastry cream and then topped it with the final layer of puff pastry.
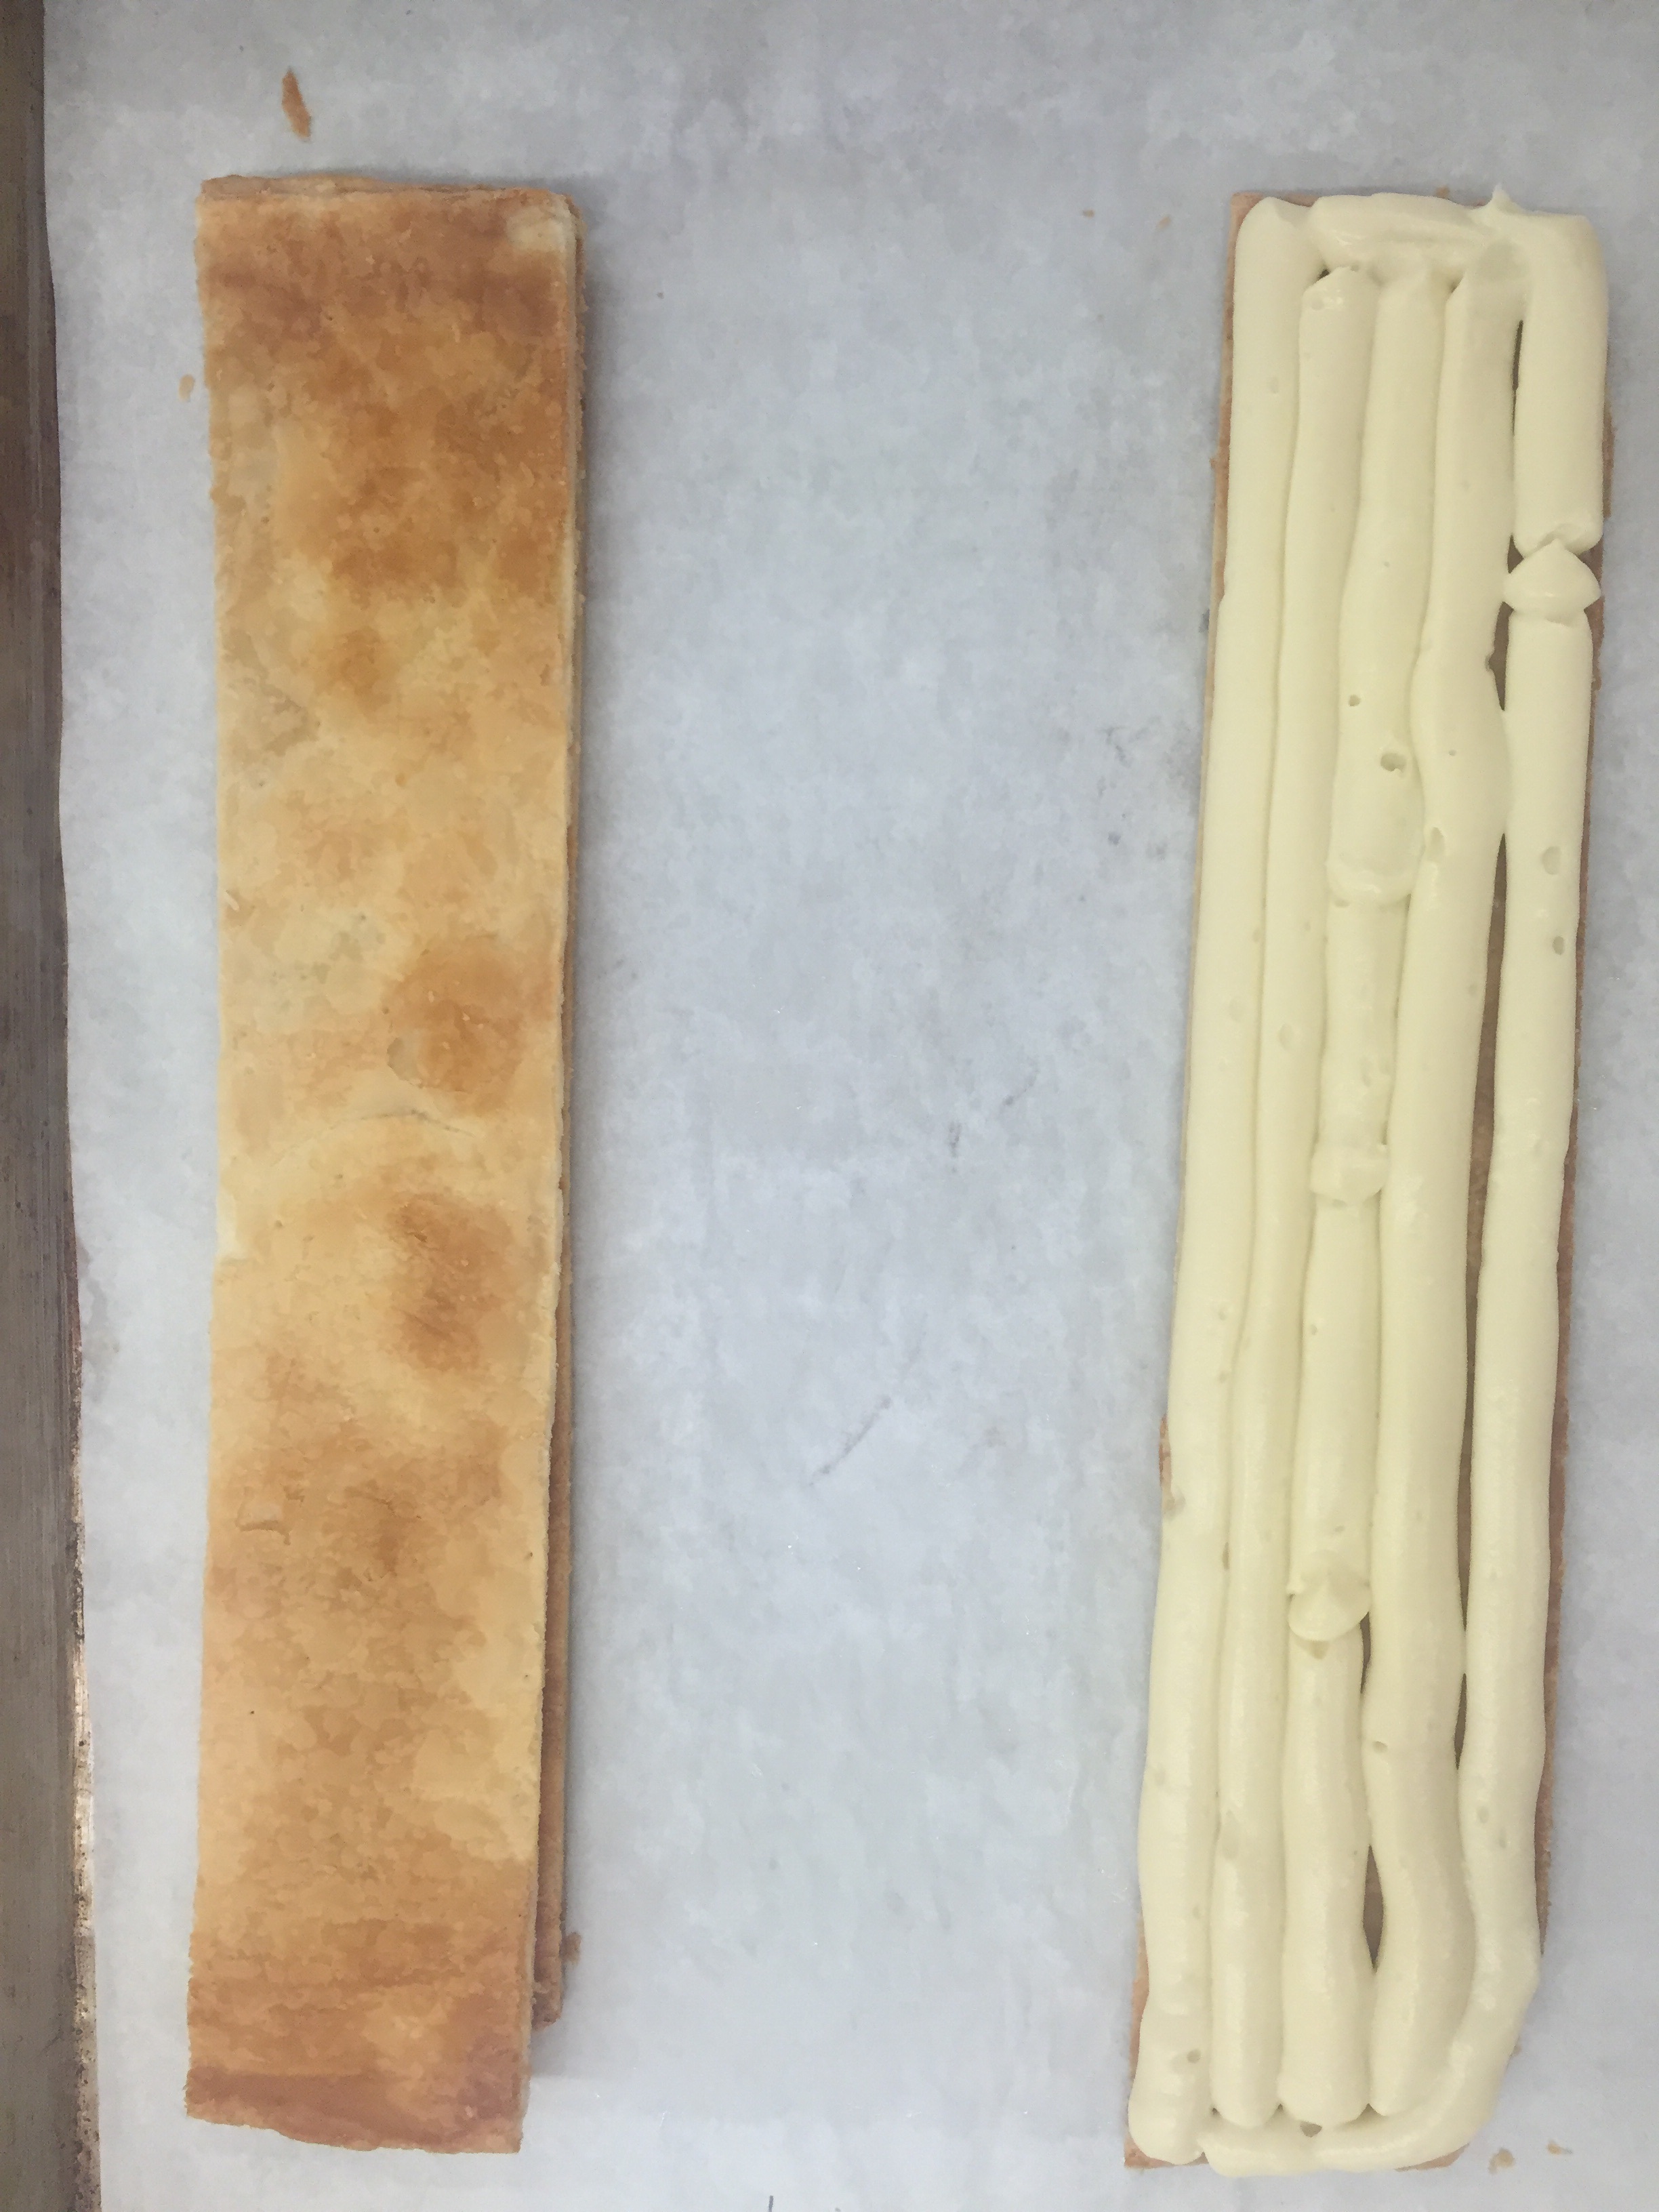
Napoleon assembly
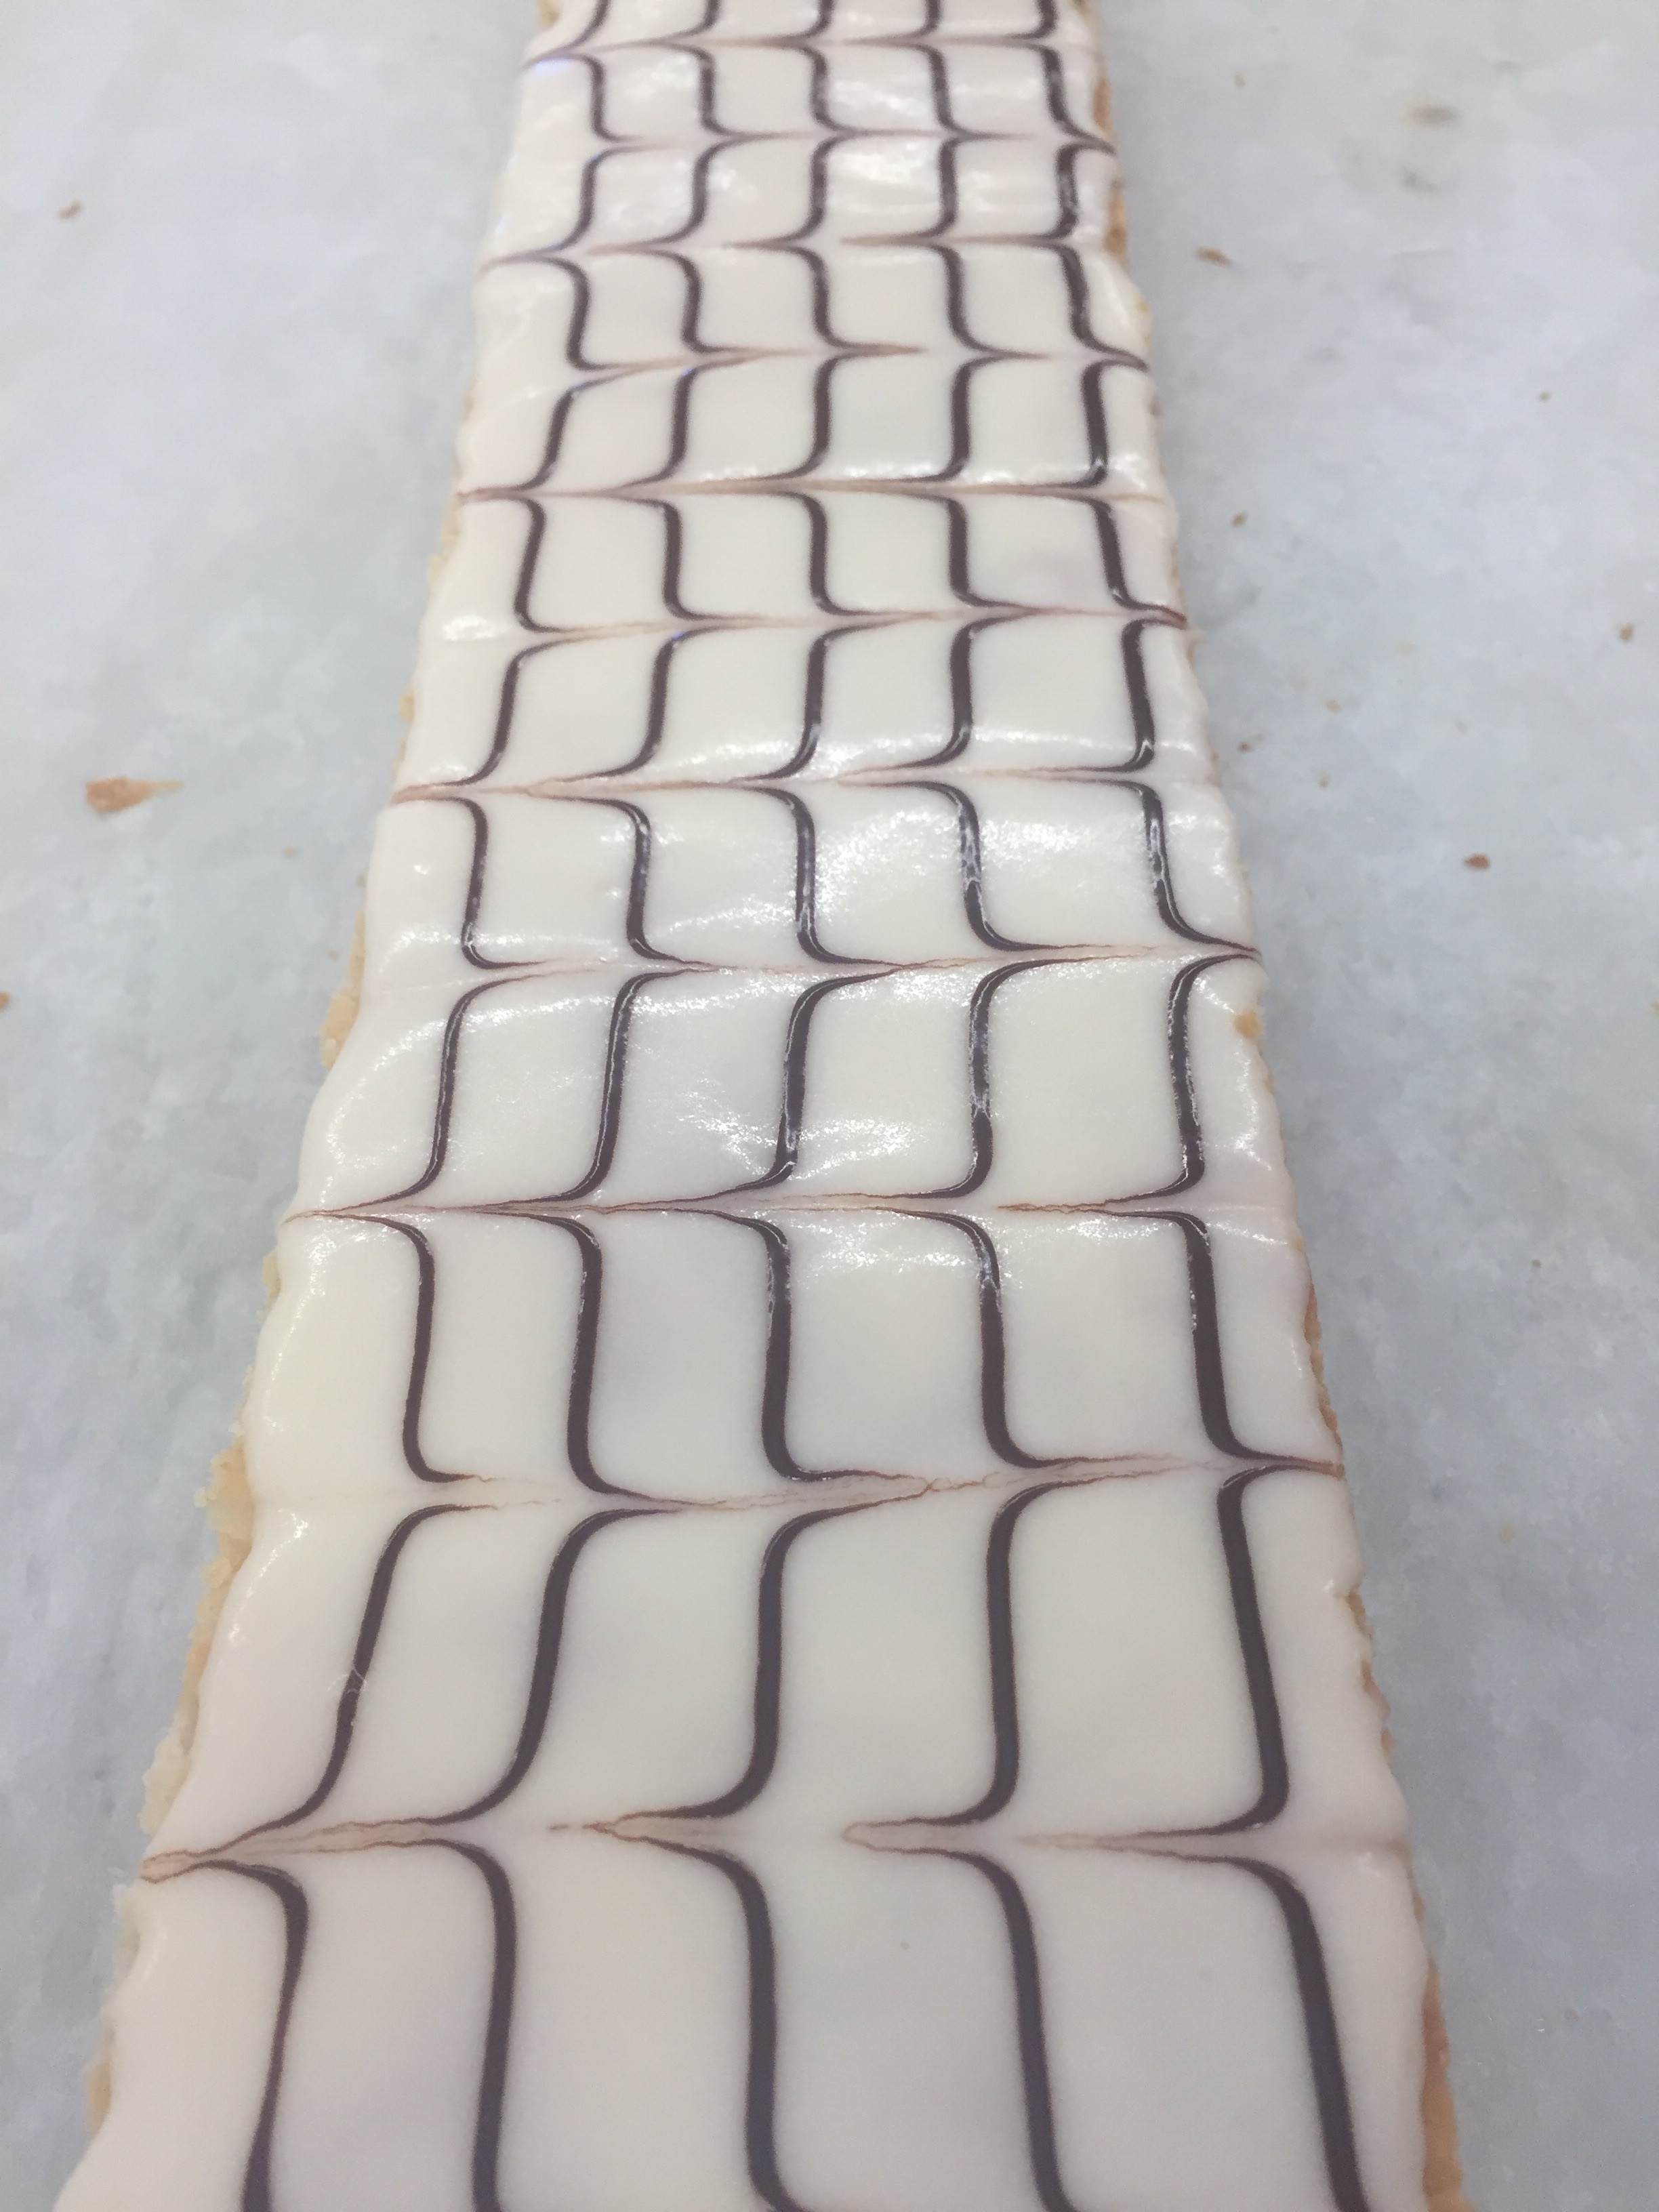
Then we decorated the top with a layer of white icing and stripes of melted chocolate. To make a pretty design, we dragged a toothpick across the top in alternating directions.

And voila! A finished Napoleon! The last step was to put it in the fridge to let the icing set before slicing it into individual portions.
One of the key things we've learned this week is that pastry is really all about the assembly of multiple components, many of which, take time and patience. After working on a number of elements over the past few days, the actual final assembly of our desserts came together rather quickly and today we completed our Napoleons and Sacher tortes.
A completed Napoleon

Cross-section of the Napoleon

Our sliced Napoleons
The last task of the day was to make Italian meringue buttercream to be used in the assembly and decoration of our vanilla Chiffon layer cakes. An Italian meringue buttercream starts with water, sugar and corn syrup, heated to the soft ball stage (238 degrees). Meanwhile, you whip egg whites and sugar into a meringue. Once the hot sugar mixture is ready, you stream it into your bowl of egg whites and proceed to whip until the bowl is no longer hot and feels about ready.
Our instructor had us make a giant batch for the entire class, so we used a commercial-sized stand mixer with a 20-quart capacity. After we had incorporated about three-fourths of the hot sugar mixture, our bowl was nearly filled to the brim...we're going to need a bigger mixer!
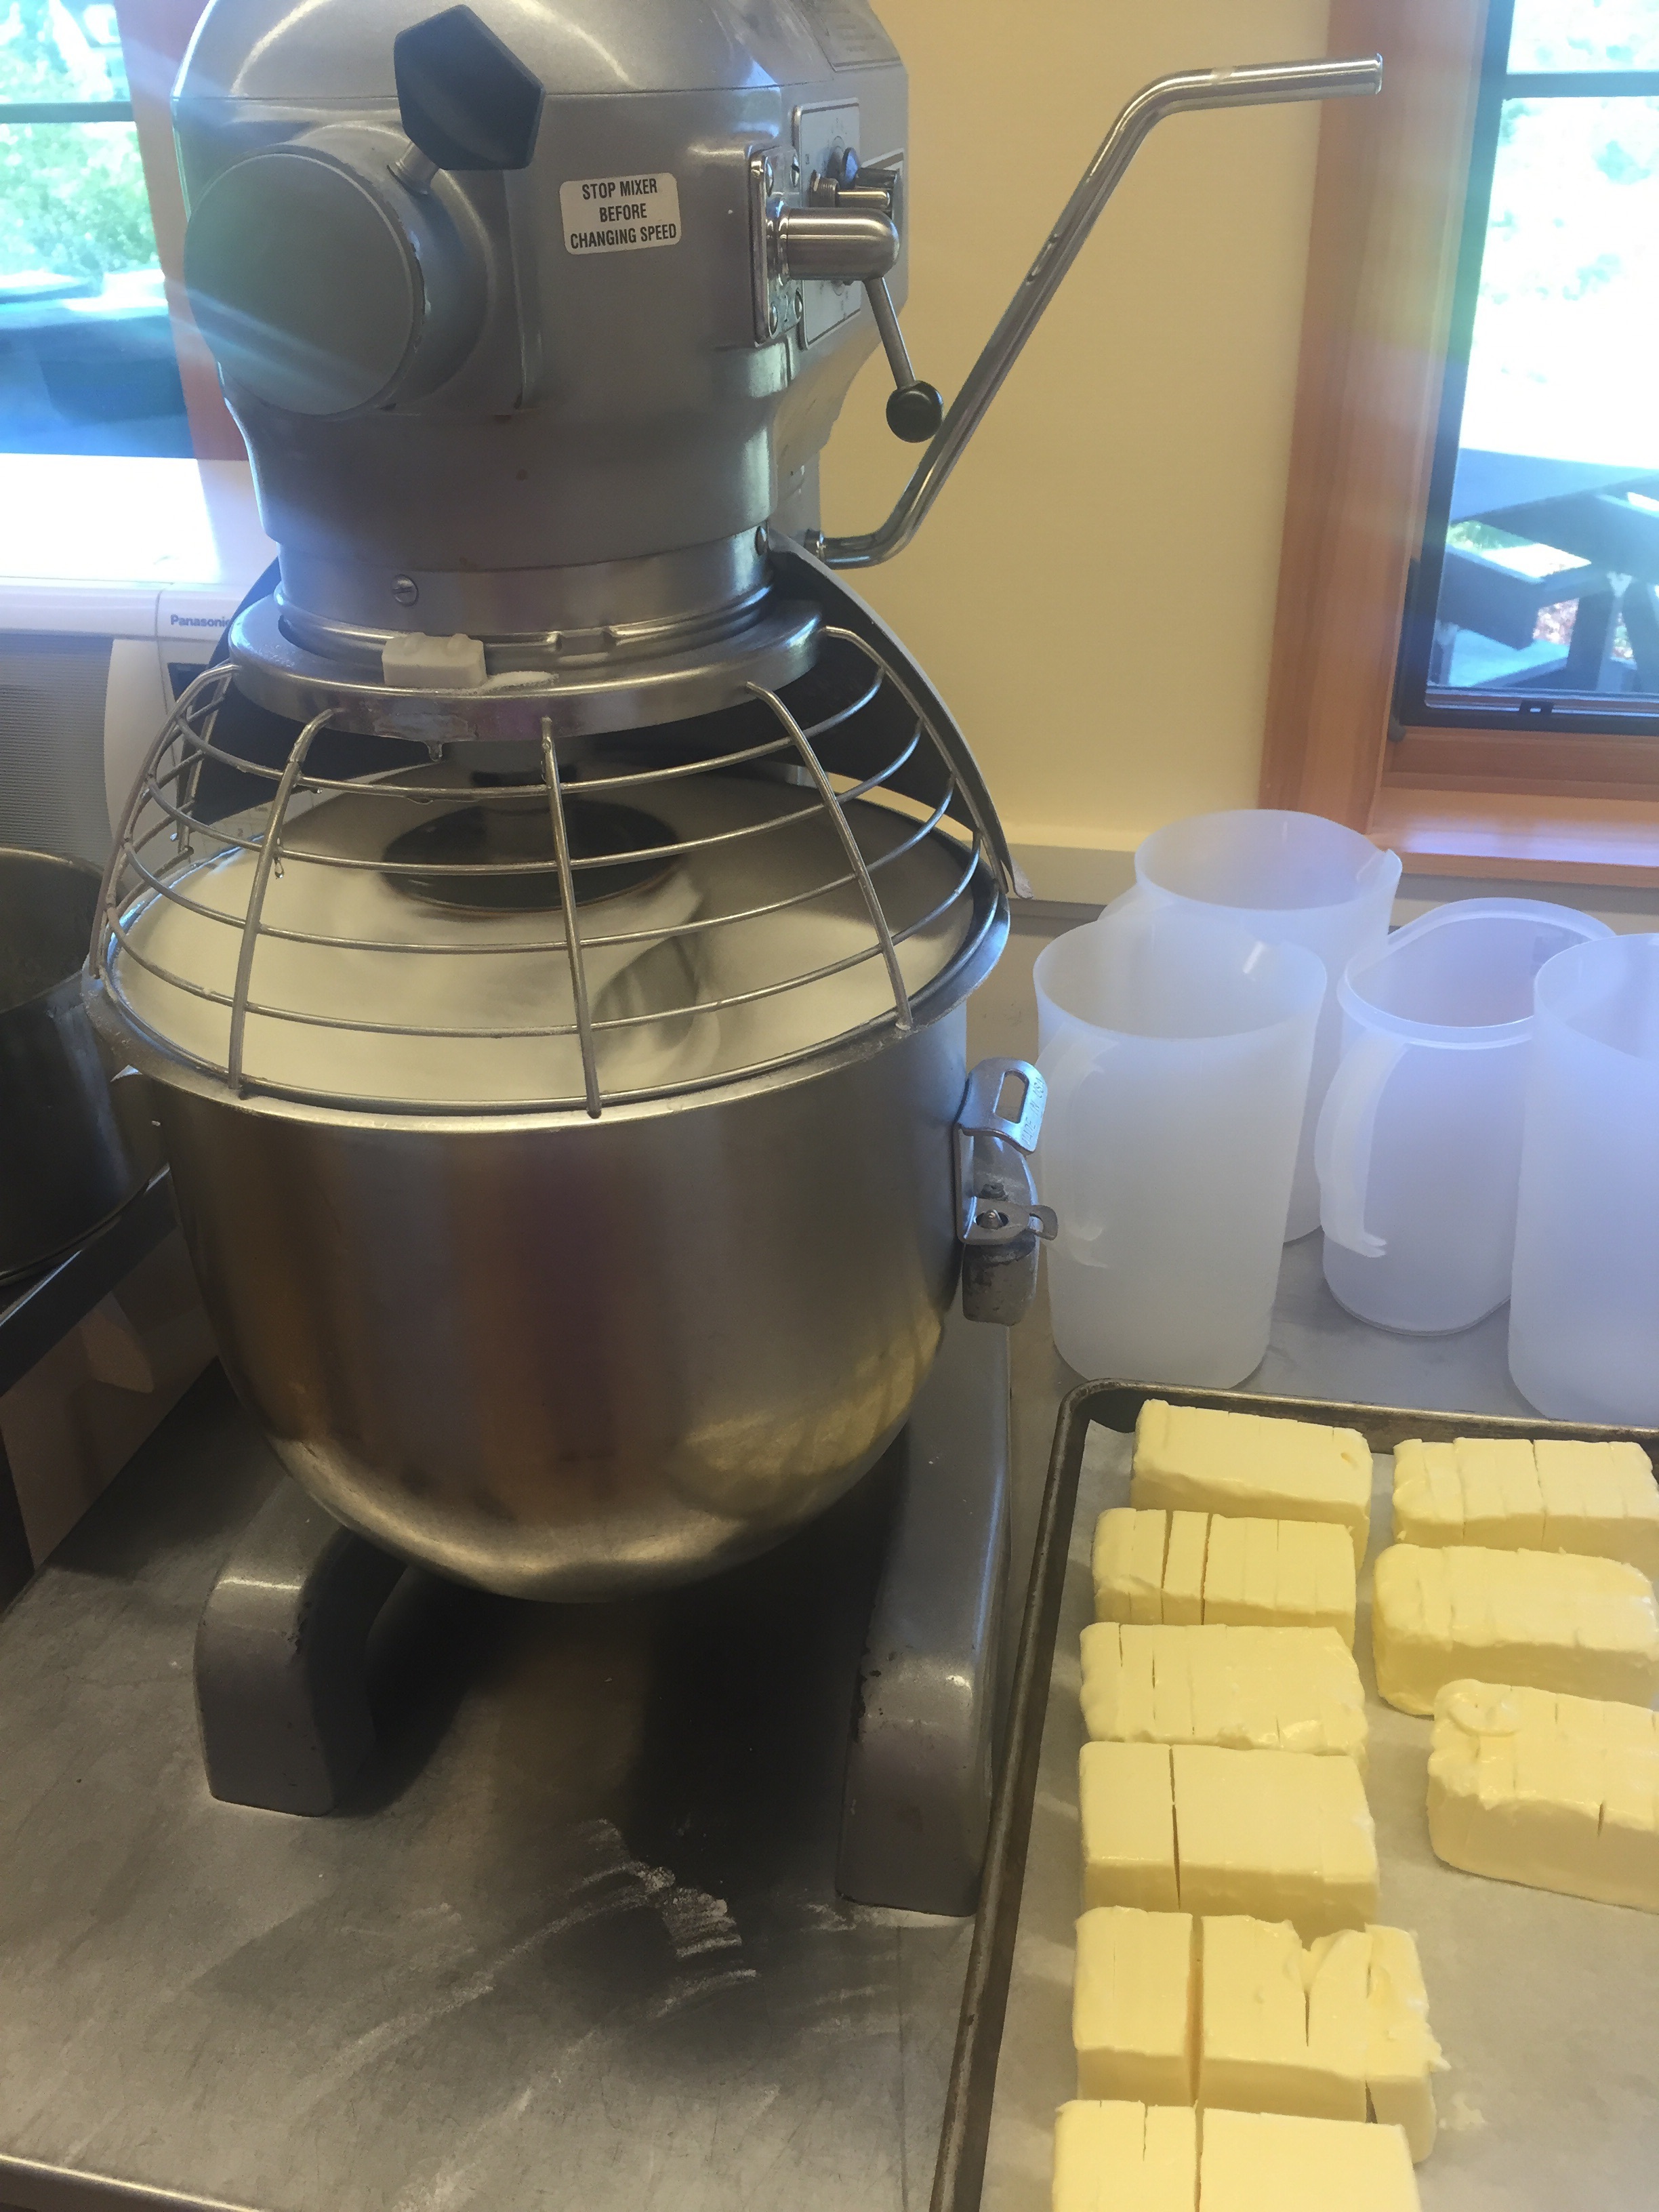
Though our 10 POUNDS of butter was ready and waiting, we were running out of room in our mixer bowl!
Fortunately, an even bigger mixer was in the commercial pastry kitchen next door - so off we went on a field trip! But first, we needed to put on hairnets, since we were entering a commercial space where food was being made for public consumption.
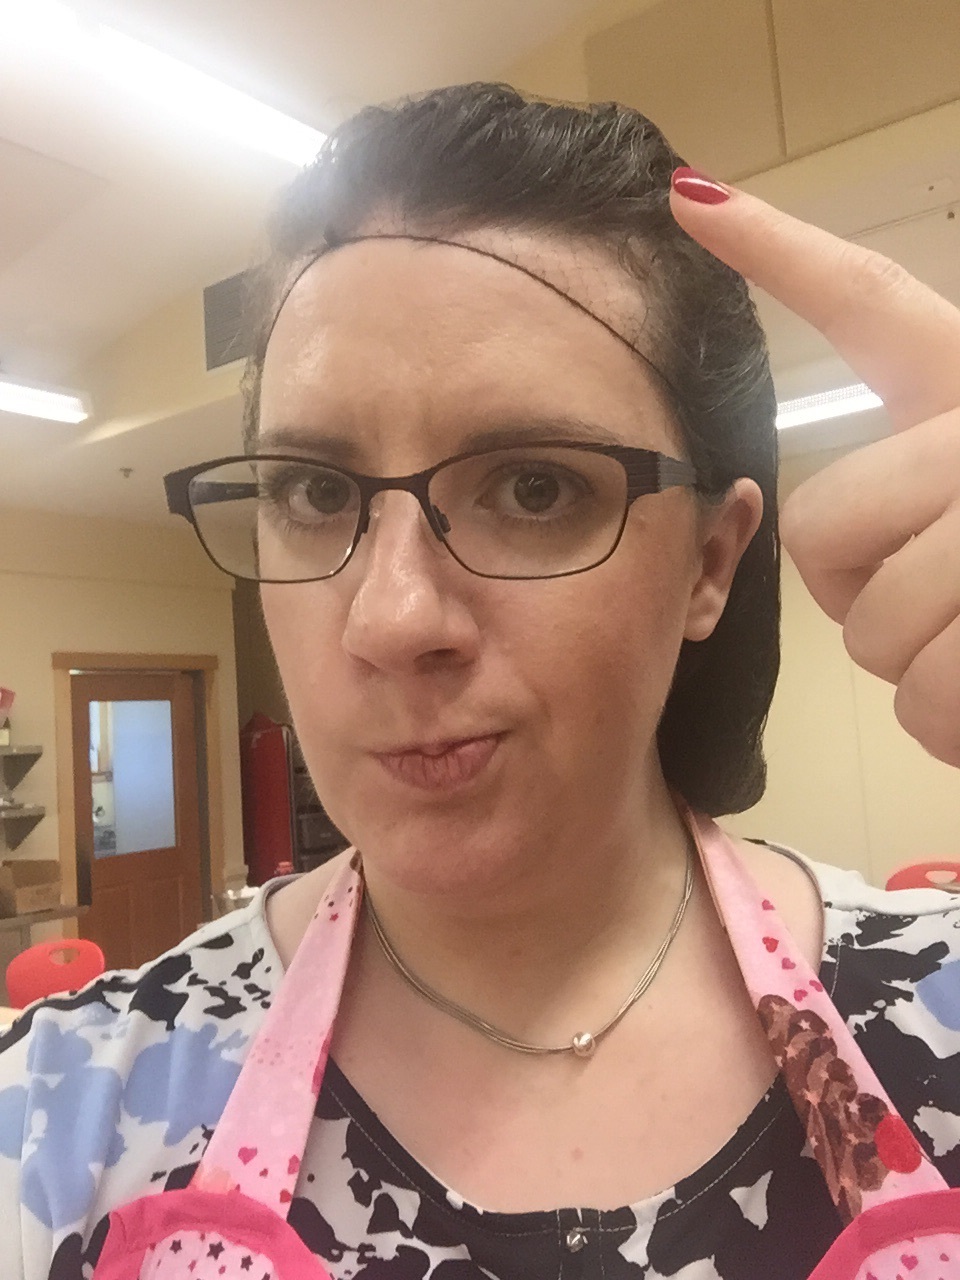
Rocking the hairnet.
We quickly became friends with this lovely 60-quart mixer which was plenty large enough to accommodate our big batch of buttercream. So once we were back in action, we finished adding the rest of our hot sugar mixture to the meringue. Once the bowl felt cool enough, we slowly added giant pats of softened butter and let the mixture whip until it was light and fluffy.

Finally found a mixer big enough for the job!

Our finished batch of Italian meringue buttercream.
Before we left the commercial pastry kitchen, we got to have a little tour and a peek into one of the walk-in refrigerators.

The walk-in fridge that is bigger than most walk-in closets!
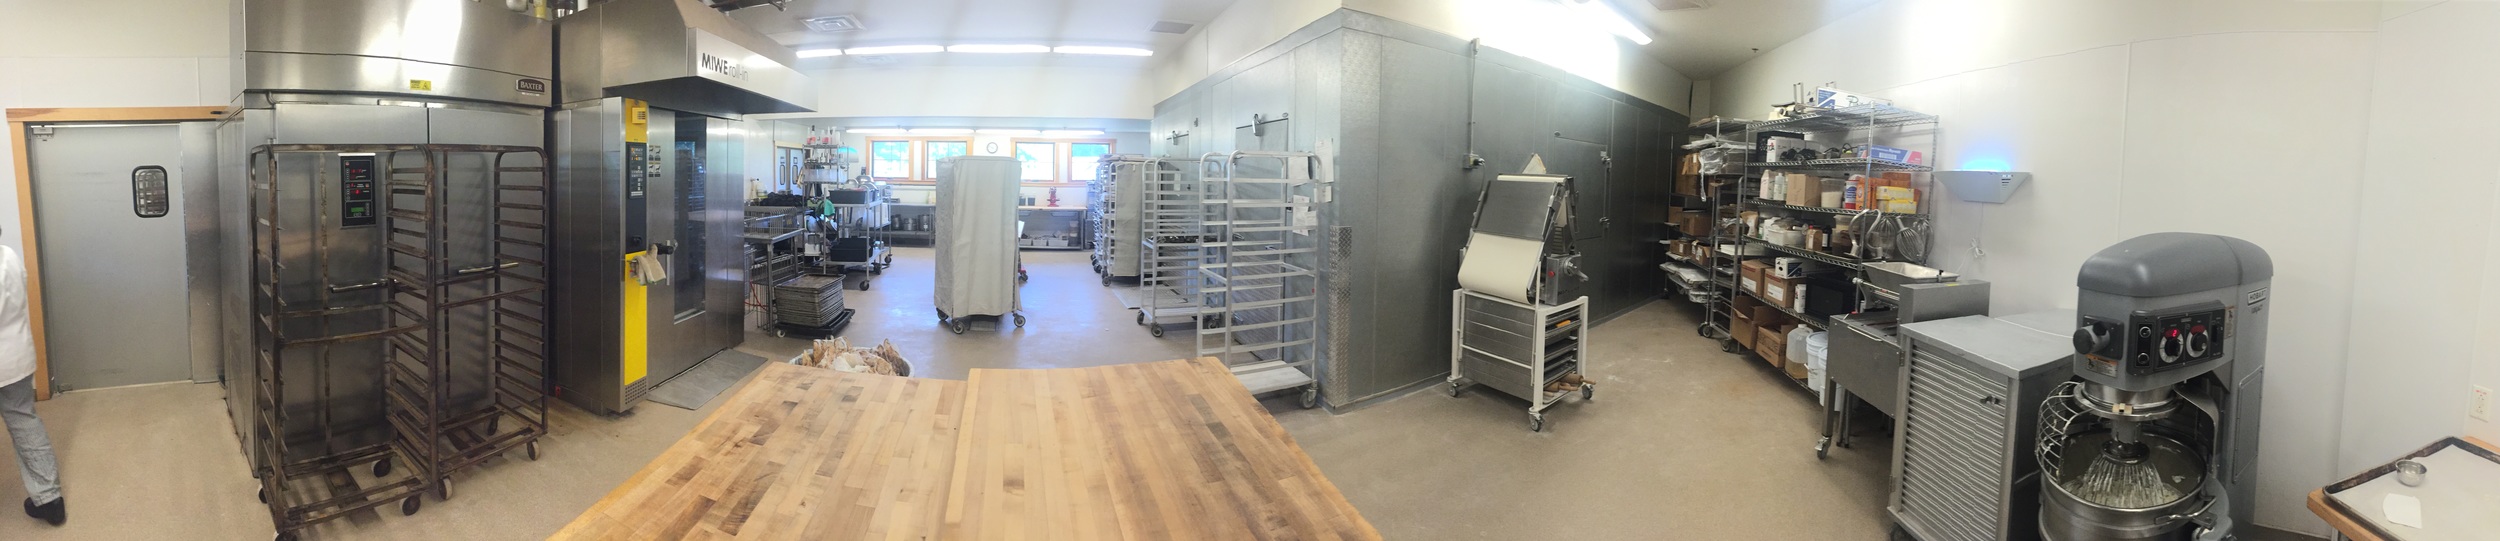
Panoramic view of a professional pastry kitchen!
So now Day 3 is a wrap and we've got just one day left. Tomorrow, it's all about chocolate and cake decorating...can't wait!