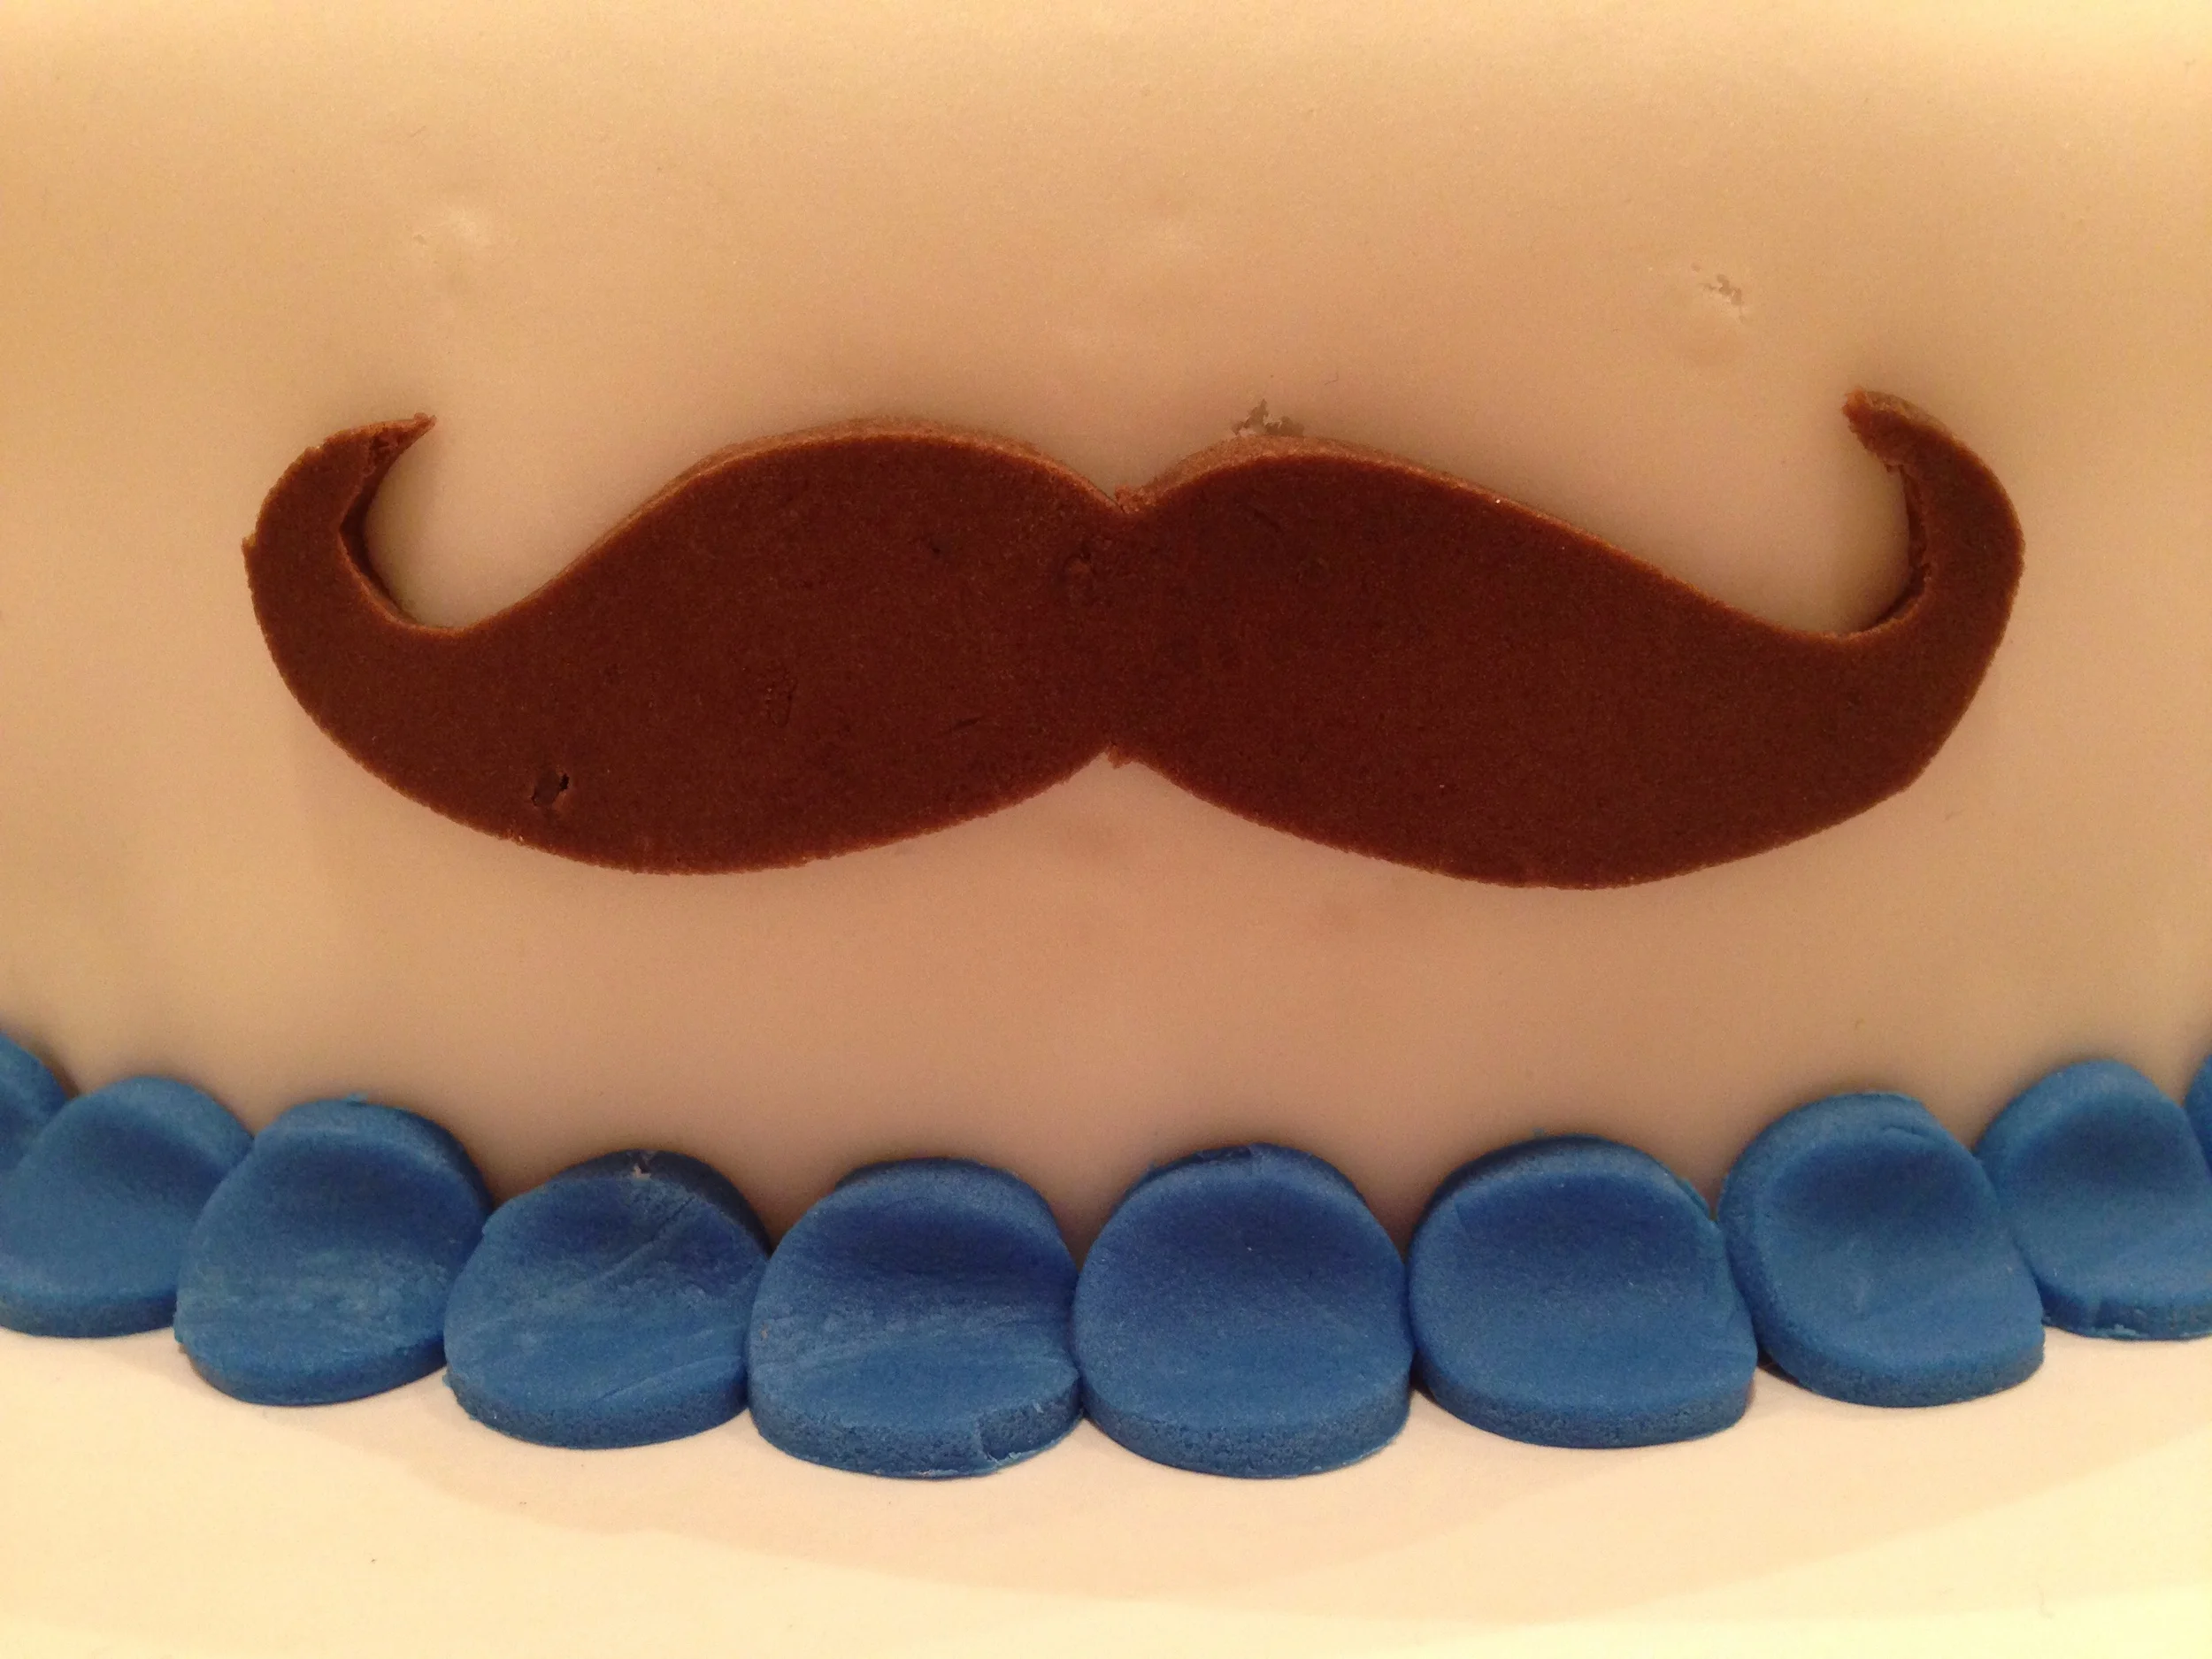
Mustache Cake
As I mentioned in my post yesterday, this past weekend was full of baking. One of the other projects I worked on was a birthday cake for a colleague of mine. He sports a mustache as part of his signature look and thought it only fitting that his birthday cake feature a mustache (or two or seven!).
I've decorated many a cakes in my day - mainly using the Wilton method for piping out hundreds of little stars to make the design. This past fall, I took a Wilton cake decorating course in fondant and gum paste and enjoyed using fondant and creating really cool layered and dimensional designs. My final project was a fall leaf cake (check out the picture in the gallery!) which I was really pleased with. I realized that I hadn't decorated with fondant since October, so I was WAY overdue for making another cake!
So here we go. First, I made two chocolate cakes (I cheated and used a box mix).

Then cut off the tops to level them out for even stacking.

So when I made that peanut butter frosting for the homemade nutter butters, I knew that I wanted to use it for this cake as well. So I made a double batch and spread a nice thick layer on the bottom cake. Then topped it off with chopped up Reese's peanut butter cups. Yum.

Then added the top layer of cake and covered the whole thing in a thin "crumb coat" of frosting. Even though I am going to cover the whole cake in fondant, it's important to add a thin layer of frosting to the entire surface area of your cake - it acts like a "glue" to keep your fondant in place. I've also read that you can add a "normal" amount of frosting as if you weren't covering in fondant. I would just make sure that you let it set and/or chill the cake so that the fondant goes on smoothly and doesn't slide around.

Now we cover the whole thing in fondant. Make sure you take into account the height of your cake (times two!) in addition to the diameter and then add on another inch or two to make sure the amount of fondant you're rolling out is big enough to cover the entire cake.

And now the fun part - cutting out the decorative pieces to add to the cake! I found an image of a mustache clipart online that I liked and used that as my template. I just laid the template directly on my rolled out chocolate fondant, and using a small knife, cut out the shape. I then used a scaled down size of the mustache for the smaller ones that decorated the side. For the letters, I used an alphabet cookie cutter set that I've had for years and finally got to use for the first time. They worked so beautifully with the fondant - really easy to cut out and affix to the cake. Speaking of which, all you need to get these decorative pieces to stick is a paint brush and a little bit of water. Just lightly brush on a bit of water to each piece and it will act like a glue, keeping the decorations on the cake!
I really love working with fondant now - you can make a really impressive looking cake in a short period of time. This took me a little over an hour to fully decorate (baking & cooling time not included). Now to think of my next excuse for a cake... Any suggestions?